Spiced Pea Stew

I don’t really like the idea of pea soup. I find it is always a bit too creamy or sweet or weird. Anyway, it was raining yesterday and I felt like soup. I was going to make chicken-something-something soup with some leftover chicken I had in the freezer, but then I found two bags of sad little peas and immediately changed my mind.

SONY DSC

This soup isn’t pretty… but it sure beats the hell out of those weird pea soup recipes you see. It’s chunky, spicy and just delicious.

Spice Pea Stew (Kaprise Kitchen Original)

  • 3 cups of frozen peas, rinsed under cold water
  • 1 medium onion, diced
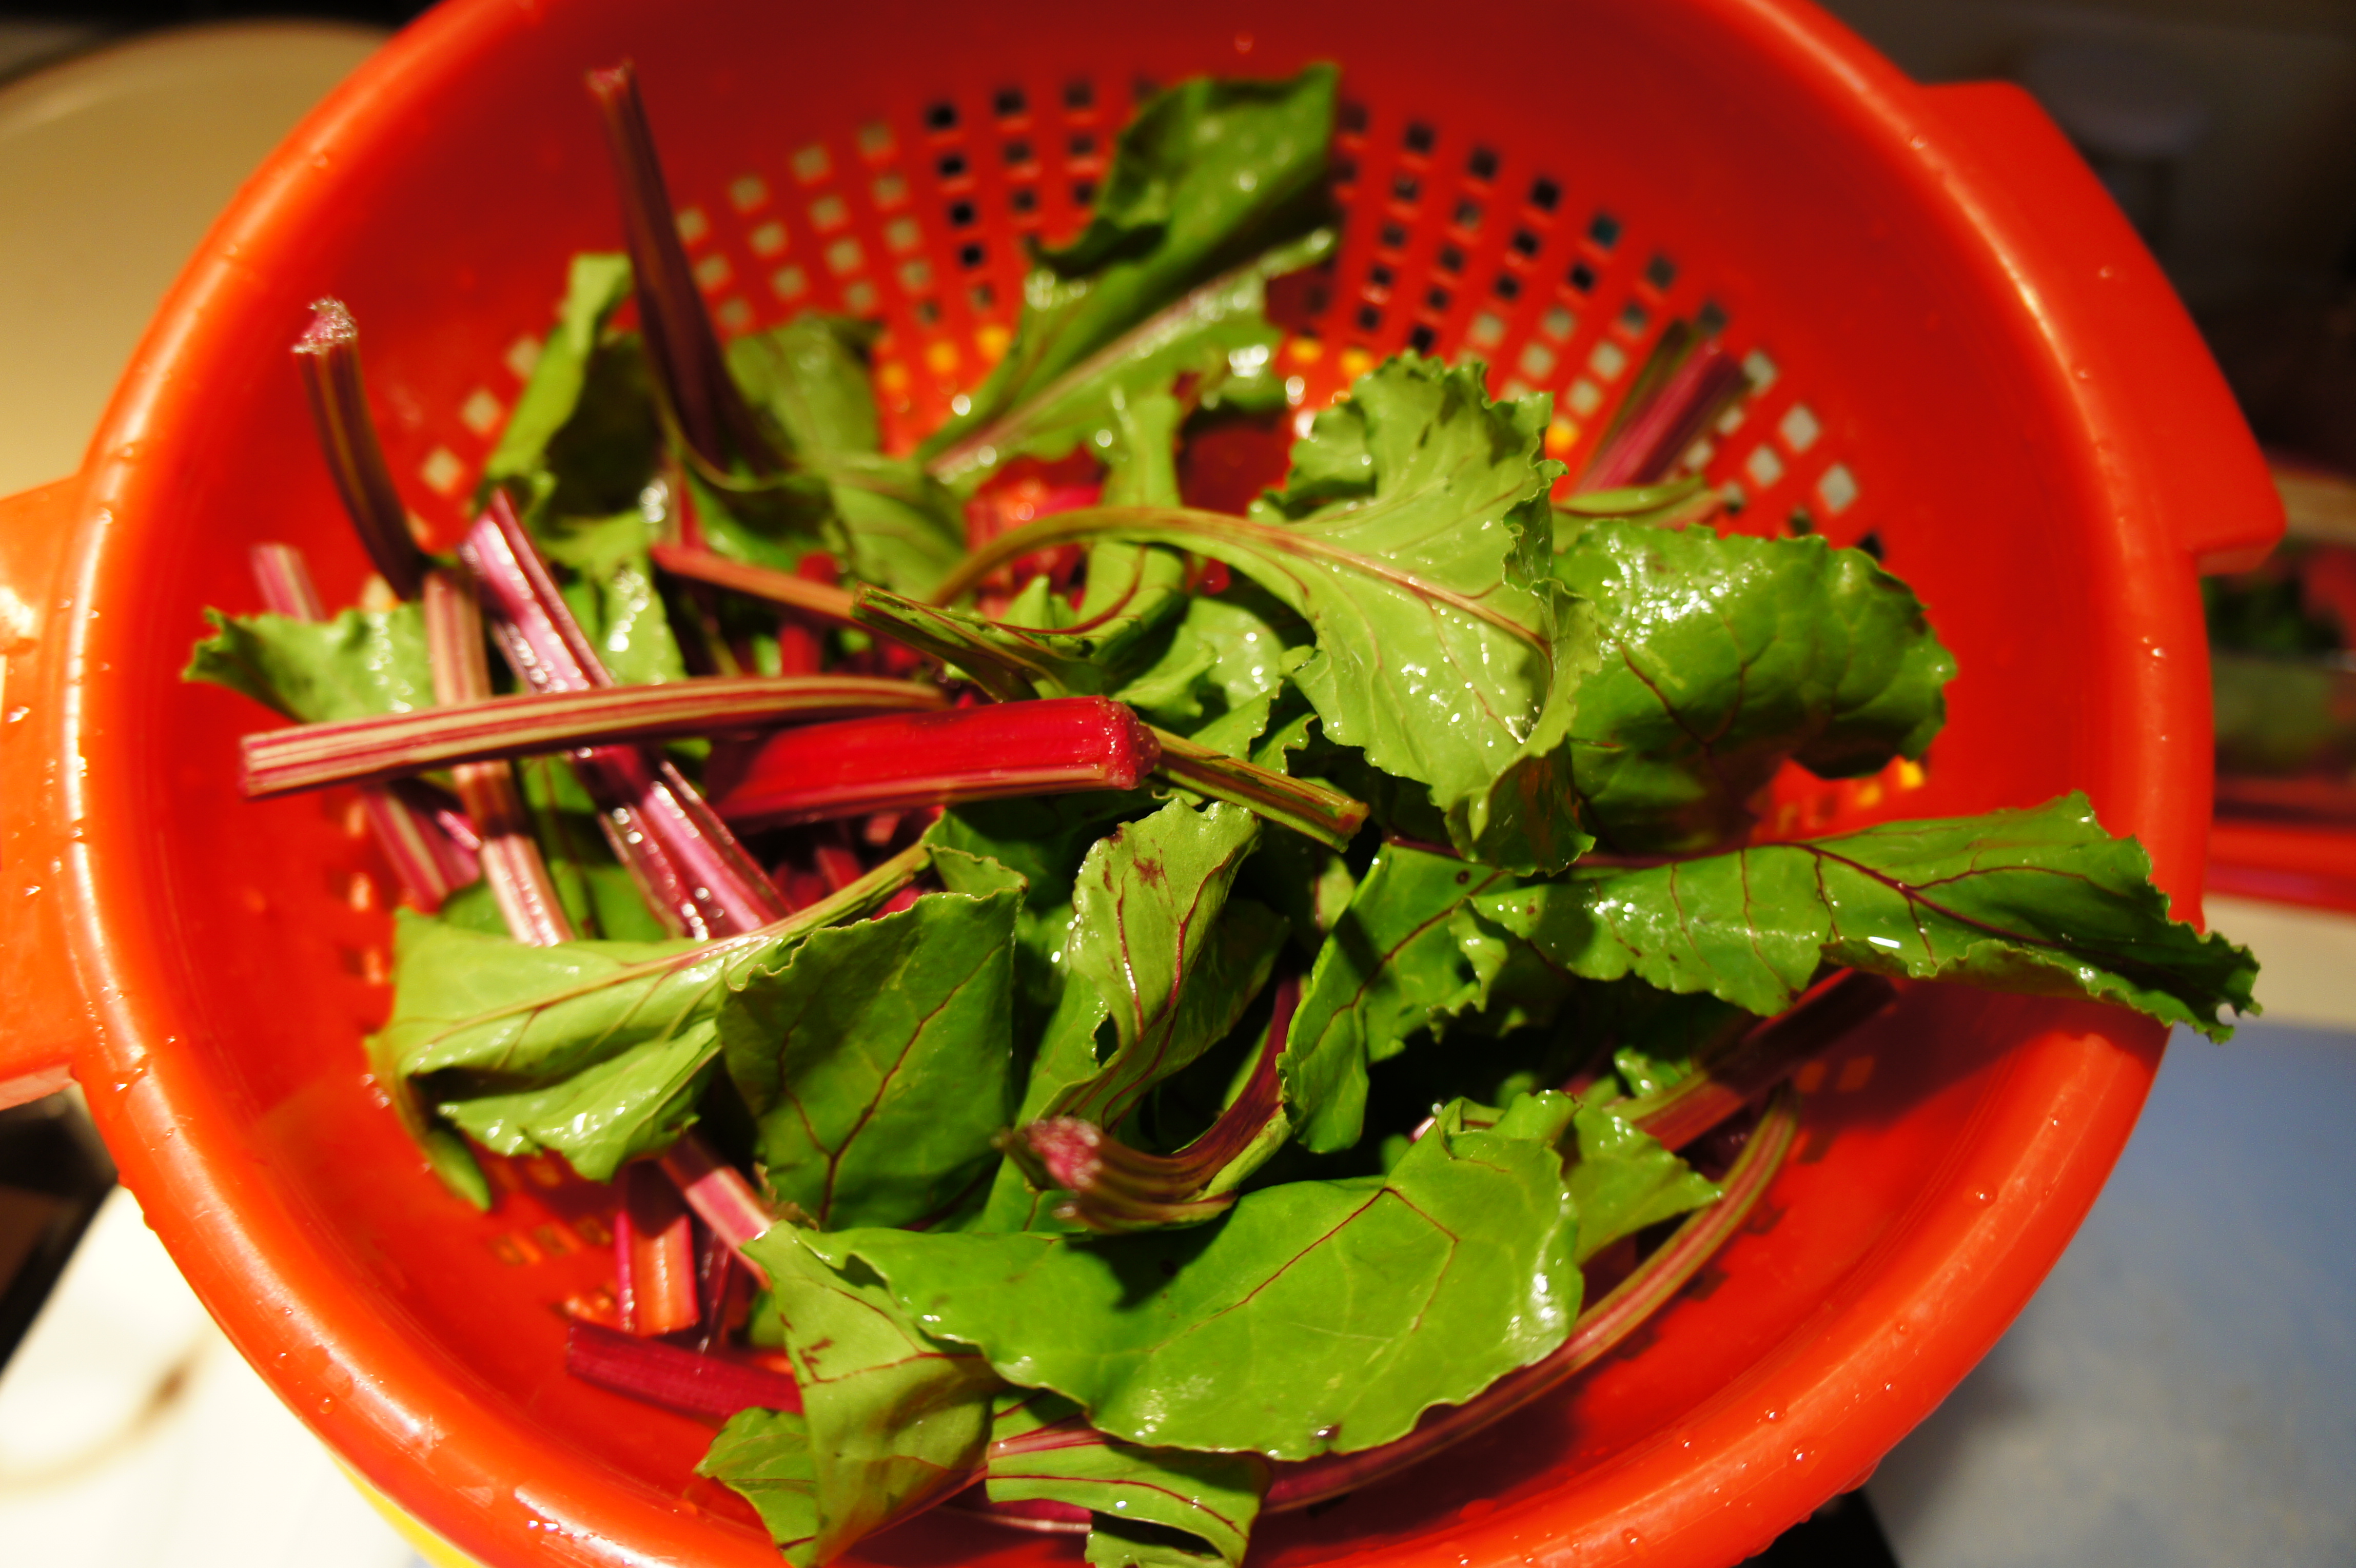
  • 1 cup of chopped beet greens (you can use spinach, kale, or any other green you would like)
  • 3 stalks of celery, diced
  • 1 teaspoon of cumin
  • 1 teaspoon of paprika
  • 1/2 teaspoon of spicy pepper flakes
  • 3 tablespoons of butter (or olive oil)
  • 1 teaspoon of salt
  • 1 teaspoon of cracked black pepper
  1. In a heavy bottomed pan, melt butter over medium heat
  2. Saute onions until soft and translucent
  3. Add beet greens and continue to saute over medium heat until soft
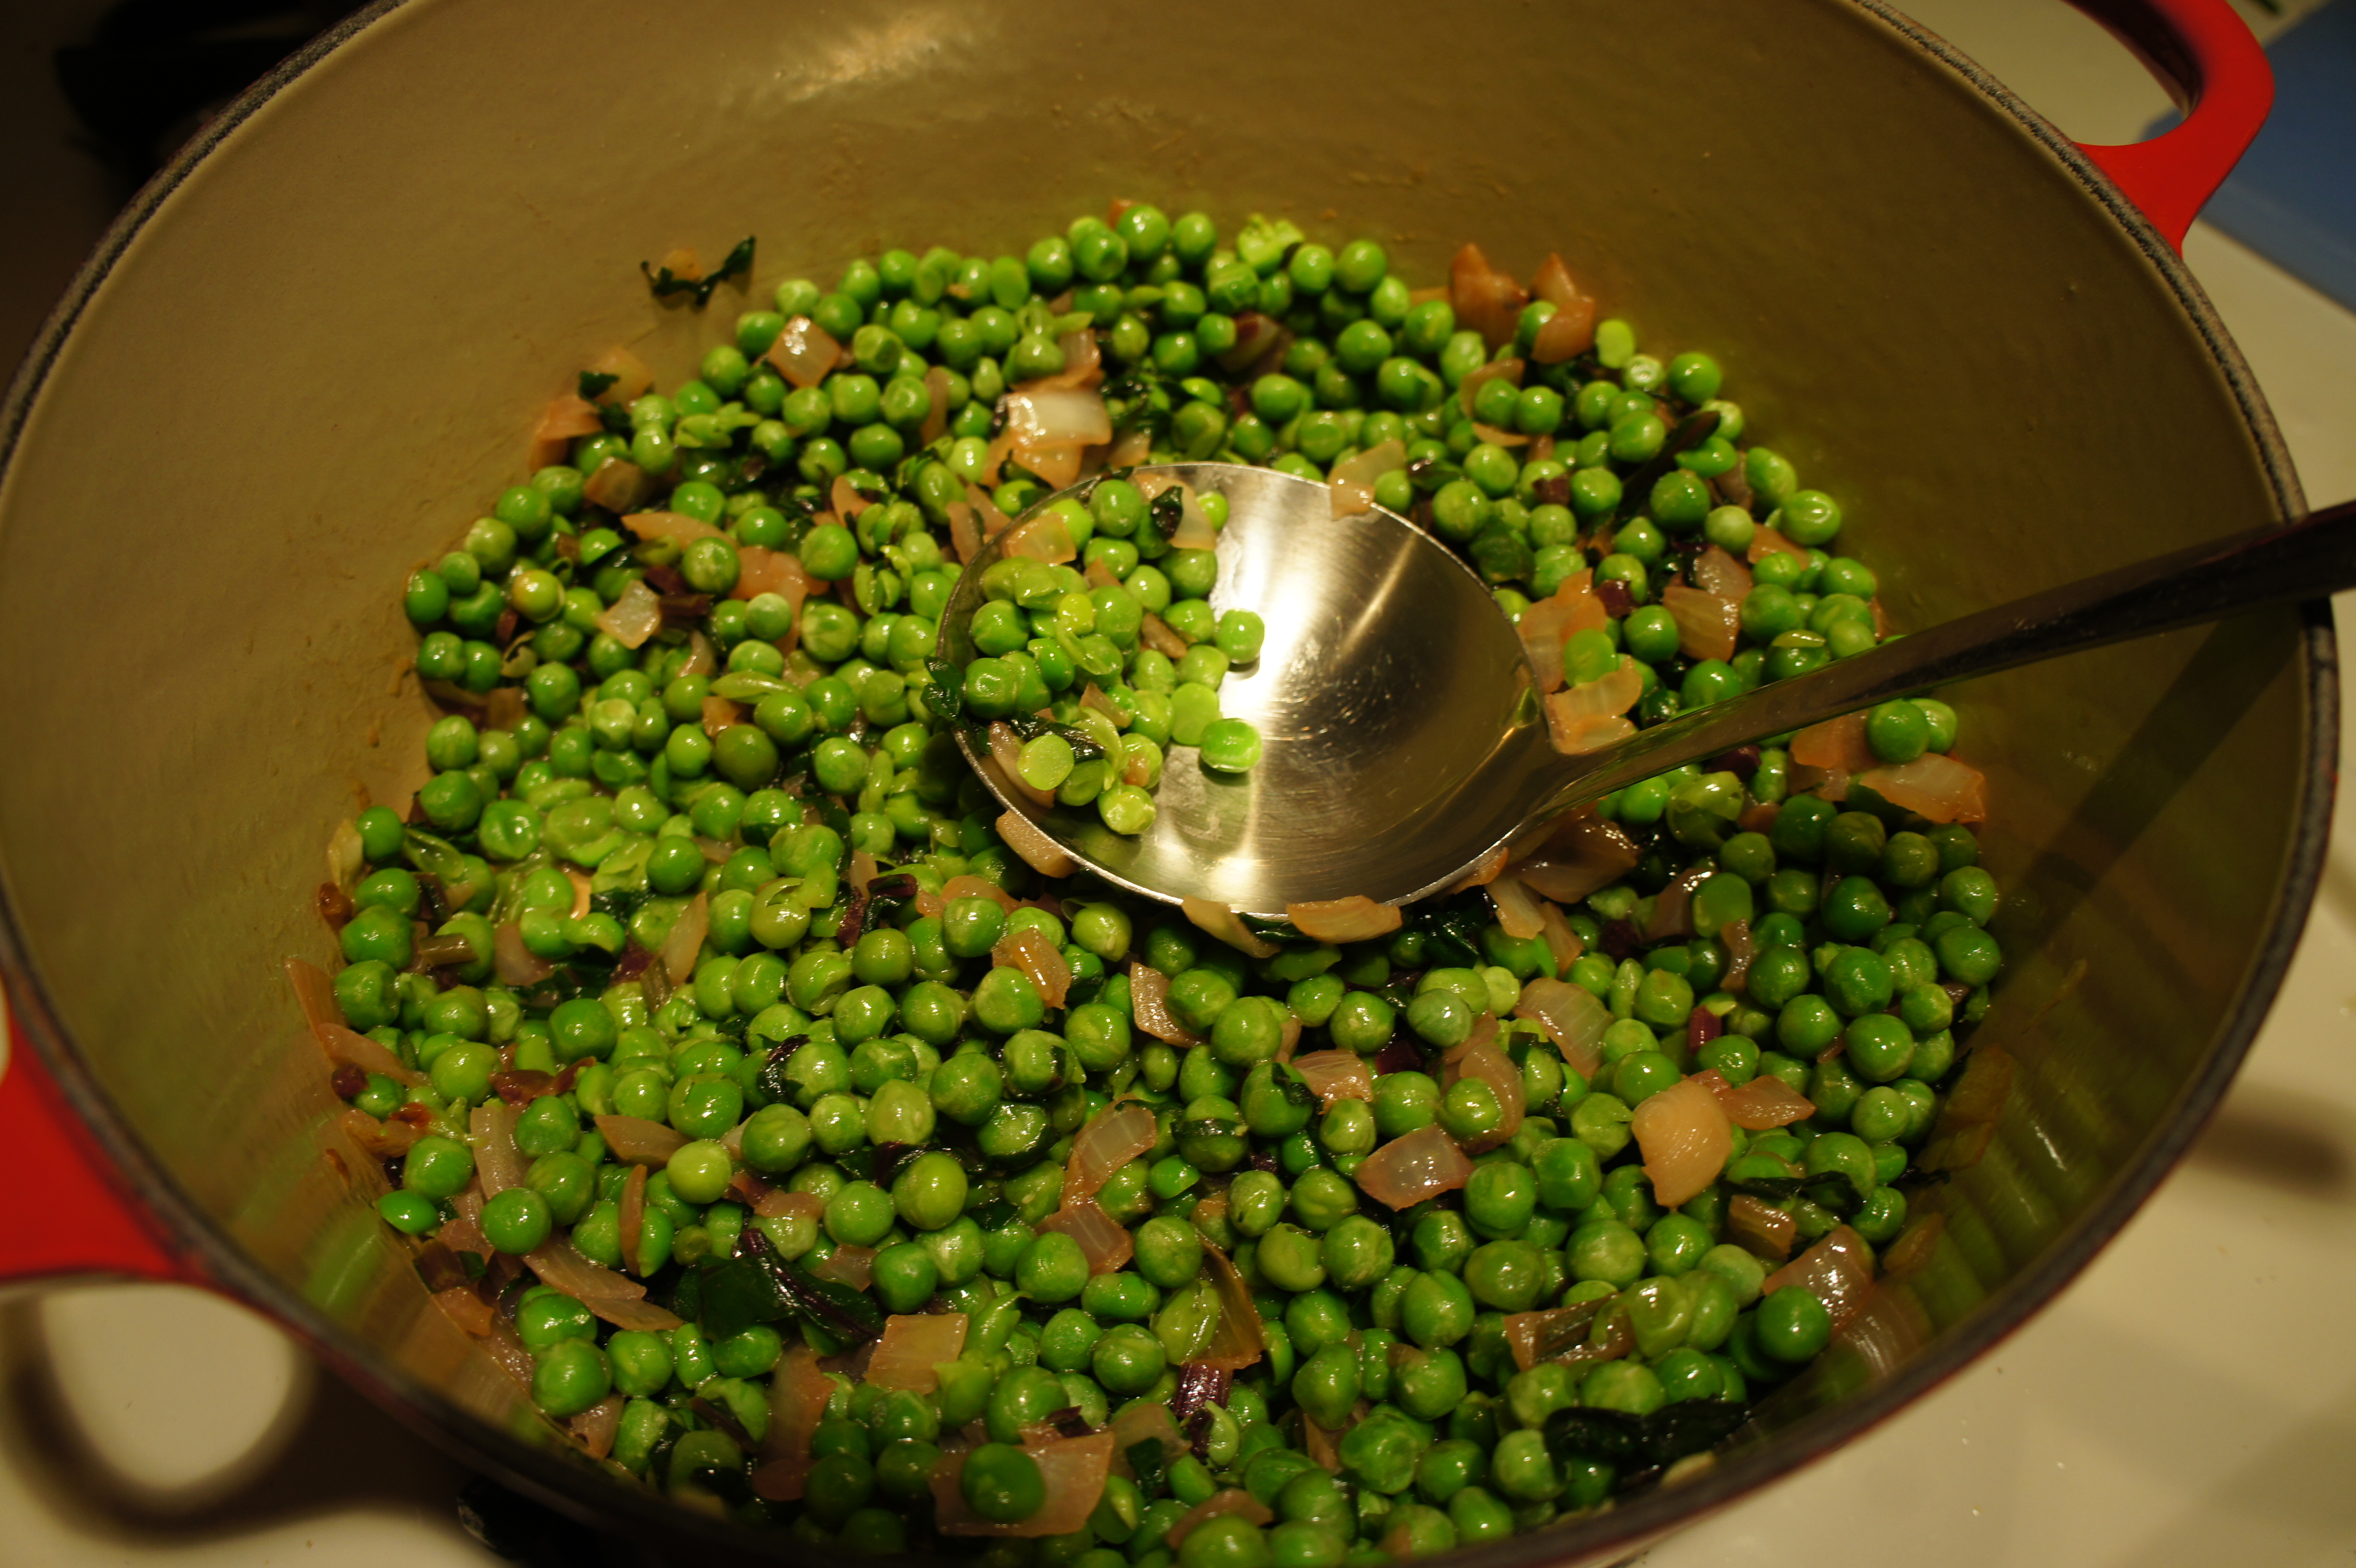
  4. Add in celery and peas
  5. Smoosh (hehe… smush? squish?) the peas with the back of a ladle. I squish about 1/2 so that there is texture to my stew (Alternatively, you could blend 1/2 of the mixture with an immersion blender or other device for a smoother texture).
  6. Add all of the spices (you may want to add in increments so that you can adjust accordingly). Taste, and adjust the seasonings as needed.
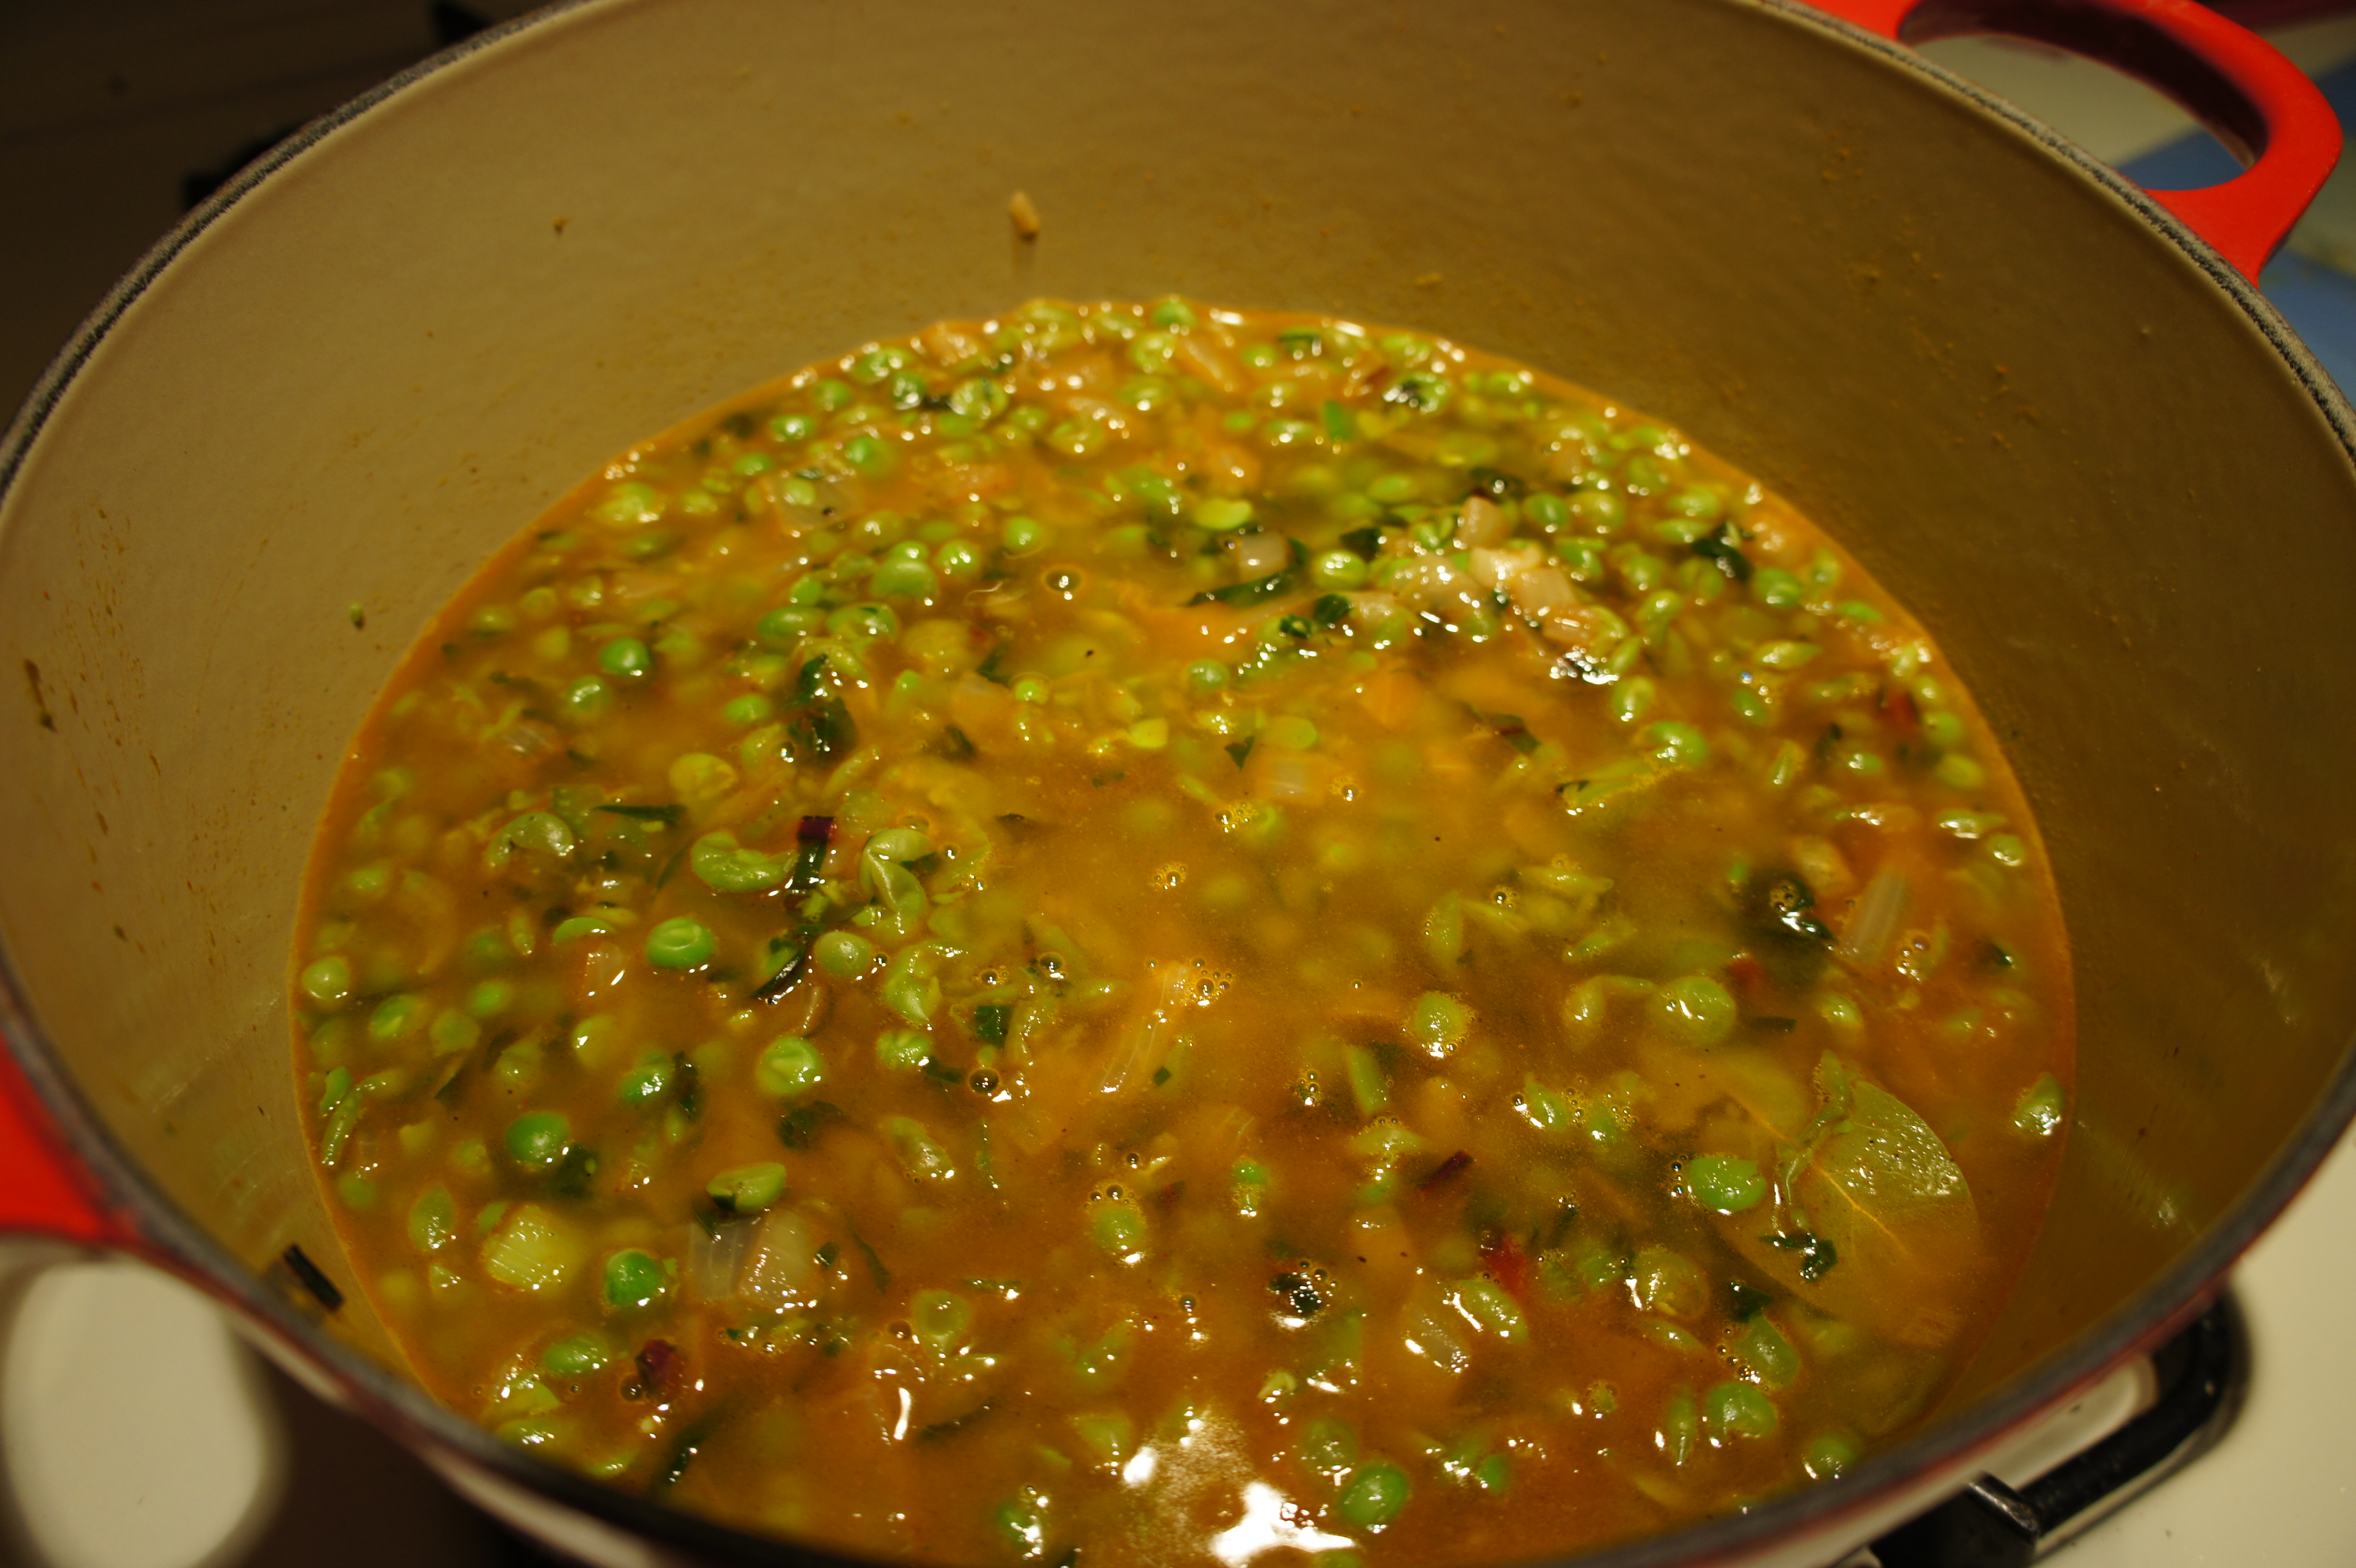
  7. Just cover the vegetables in filtered water, cover and bring to a boil
  8. Lower the temperature and simmer for 20 minutes
  9. Serve and enjoy!

SONY DSC

SONY DSC

SONY DSC

SONY DSC

SONY DSC

SONY DSC

Baked Ginger Carrot Quinoa

SONY DSC

Baked Ginger Carrot Quinoa (Imagined up while driving)

  • 1 cup of uncooked quinoa
  • 8 carrots shredded (should equal 2 1/2 cups)
  • 1 cup of chopped broiled brussel sprouts (feel free to substitute with any cooked green)
  • 1 tablespoon of fresh ginger, chopped finely
  • 1 tablespoon of grainy mustard
  • 1 teaspoon of cumin (feel free to scale back… my older sister tells me I’m heavy handed with cumin)
  • 1 teaspoon of salt
  • 1 teaspoon of pepper
  • 4 eggs, whiskey
  • 3 tablespoons of olive oil

Before we get started – I am going to suggest that you add the spices in increments. I really wanted a gingery-carrot flavor so I was heavy handed with my ginger, but for those of you who are less inclined towards ginger, cumin, and mustard, you should add in small increments so that you can season accordingly. The result I got was a mildly spicy quinoa cake with a crispy exterior and squishy inside… so if you want even MORE ginger, go for it!!!

  1. Thoroughly wash quinoa in a mesh sieve
  2. Bring quinoa to a boil in 2 cups of water. Once the water comes to a rolling boil, lower the heat to low/medium and cover. Cook for 20 minutes, or until the quinoa has cooked through. Fluff with a fork and let it cool.
  3. In a large bowl, combine the shredded carrot and brussel sprouts
  4. Add the quinoa and stir until well combined.
  5. Slowly add your spices until you get the flavor profile you like. Keep in mind that the ginger will mellow significantly as you cook.
  6. Mix in whisked eggs until well combined.
  7. Drizzle olive oil on a cooke sheet. I used a foil covered sheet, but still found that I got a little sticking, so I recommend using a non-stick surface and plenty of oil. I don’t think parchment paper will work since it will absorb the moisture, but perhaps a silicone baking sheet, or an enamel pan would work. Let me know in the comments if you end up finding a better solution than tin foil!
  8. Measure out 1/3 cup fulls of quinoa. Pat into circles and place evenly spaced on a cookie sheet
  9. Bake at 400F for about 30-40 minutes, or until the bottoms have browned and the insides are cooked through. I drizzled a little extra olive oil at the 1/2 point.
  10. Enjoy with salad!!!

I hope you guys enjoy this variation of quinoa patties. I felt like I needed to come up with one that didn’t require me hovering over sputtering oil, and this was just the ticket.

SONY DSC

SONY DSC SONY DSC
SONY DSC


Garlicky Parsley Buttered Mussels

Today, I went for a run, and then I got back and ate two bars of caramel chocolate before deciding to join the adult world and eat real food.

I saw these mussels in the freezer, and decided that a quick bake in the oven with some garlicky sauce would be just the ticket for an adult (and not chocolate/sugar) filled meal. Bonus points for being paleo friendly.


Garlicky Parsley Buttered Mussels (an inspired Kaprise Kitchen original)

  • 1 pounds of mussels (I used frozen ones that were already shelled)
  • 1 tablespoon of butter
  • 1 1/2 tablespoon of chopped garlic
  • 1 small bunch of parsley chopped to bits (haha I felt like saying “chopped to bits”)
  • Salt and pepper to taste
  • 1/4 cup of macadamia nuts, smashed (with a wine bottle)
  1. Arrange mussels in a baking sheet, you may use a rack like I did, or simply let them rest on the sheet
  2. In a small heatproof bowl, melt the butter and stir in the parsley and garlic. Salt and pepper to taste
  3. Gently spoon the mixture over the mussels
  4. Top with a sprinkle of your “smashed” macadamia nuts
  5. Bake at 400F for 20 minutes, or until cooked through.

While my mussels baked, I made a quick mushroom pasta and threw the mussels and a little bit of the baking liquid over it before devouring. Delicious!!!

Note: I baked mine in a small convection toaster oven… the best place to make food for one or two.


SONY DSC

SONY DSC

SONY DSC

SONY DSC

SONY DSC


Sweet Potato Baja Fish Bites

Guys… Baja fish. It’s tender, delicate, and delicious. Mine was prepared simply… just a tiny pinch of salt and a light dusting of flour before being pan fried in olive oil. Can I just tell you? AMAZING!

I had a few pieces of fish left over, and I couldn’t stop thinking about ways to prepare the fish. Scallion? Ginger? Salad? Sandwich?! Then I thought, “BITE-SIZED!” and came up with this!

SONY DSC

Sweet Potato Baja Fish Bites (Kaprise Kitchen Original)

  • 2 filets of baja fish
  • 1 teaspoon of salt
  • 3 tablespoons of flour (for those Paleo eaters, you can omit this all together or batter your fish in egg, or dip lightly in fine almond flour)
  • 1 sweet potato
  • 1 carrot
  • 1 teaspoon of grainy mustard
  • 1 teaspoon of balsamic vinegar reduction
  1. Slice the sweet potato and carrot into 1/2 inch slices, toss in olive oil, and roast in the oven at 425F for 25 minutes, until crisp. (You can also do this the day before and chill in the refrigerator)
  2. Heat a non-stick skillet with a little olive oil. Sprinkle the baja fish with a teensy bit of fine salt and lightly flour. Fry the fish for 4 minutes on each side, until cooked through. (Also, can be done a day in advance and chilled in the refrigerator)
  3. In a large serving platter, place the slices of sweet potato
  4. Gently brush each sweet potato with a thin layer of mustard
  5. Top each sweet potato/mustard with a piece of fish, sliced to fit the pieces.
  6. Garnish with a little sliver of roasted carrot
  7. Top each bite with a drop or two of balsamic vinegar reduction.
  8. Eat!!!

Balsamic Vinegar Reduction: Super easy! Just put some balsamic vinegar in a non-reactive pan, medium heat, cover, and reduce until 1/2 volume. Make sure your kitchen is well ventilated, and please, for the love of cooking, do not sniff the mixture! Just let it bubble away until it’s 1/2 volume. Cool and store in an airtight jar. Use on anything.

Note: You can use any type of left over fish in this recipe. I do think that the baja was a perfect match for the sweetness of the sweet potato, but I can see cod being really good too. I would do a tilapia also, but maybe with a chili-cilantro salsa instead of balsamic.


SONY DSC

SONY DSC

I hope you guys enjoyed this recipe! Also… Happy Valentines Day!!! Celebrate those you love, and celebrate yourself, because there is no one else you should love more!!!

xoxo -H

Dwan-Jjang Gook (Soybean Soup)

It’s really unclear how to spell Korean words in English. Sometimes I think they sound one way, but then the conventional spelling that most people online is completely different. Anyway – I think it should be spelled “dwan-jjang” but I have seen “doenjang” and “ddanjjang” and some others. Regardless of the English spelling, dwan-jjang is fermented soybean paste. It’s made in a variety of ways, but One Fork, One Spoon wrote a little bit about it, so hop on over to read up if you are interested.

Personally, I find the word “fermented” to be a bit off putting, which is why I excluded it from the title of my post. Anyway – this is a quick way to make dwan-jjang gook, or fermented soybean soup. From start to finish it takes less than 30 minutes. I start my rice first, and then start on the soup. I usually make my rice in a cast iron pot or a stoneware pot… Let me know if you want me to do a more in depth post on making rice without a rice cooker.

A quick note before I do get started, for people with gluten intolerance or sensitivity to wheat, this is NOT the soup for you. Many of the commercially manufactured dwan-jjang pastes include some form of wheat… if you are set on eating the soup, you will have to do significantly more research into what types of commercially produced paste do not contain gluten.

Dwan-Jjang Gook (the way my mother makes it)

  • 1/2 cup of dried anchovies, or “mael-chi” 
  • 4 cups of water
  • 3 tablespoons of dwan-jjang paste (I suggest started at 1 tablespoon and working your way up as your paste may differ in flavor and saltiness than mine.
  • Scallions (optional)
  • 1-3 teaspoons of soy sauce (also, for gluten sensitive folks, almost all commercially manufactured soy sauce contains wheat so watch out for this also)
  1. Boil4 cups of water with the anchovies for about 20 minutes
  2. Remove the anchovies from the water and discard
  3. Muddle the gwan-jjang paste 1 tablespoon at a time into the anchovy stock, and bring to a simmer
  4. Add soy sauce to taste
  5. You can add any variety of vegetable at this point. My favorite is spinach.
  6. Pour the soup over rice and enjoy!!

Easy right?!

Little anchovies in water

SONY DSC

Washed spinach leavesSONY DSC

Skimming the anchovies out of the soupSONY DSC

Dwan-jjang pasteSONY DSC

Adding the paste to the soupSONY DSC

White rice and spinach leaves (I usually just pour the hot soup over the leaves so my spinach is “just” wilted, but feel free to add them to your soup as it simmers.SONY DSC

Soup, rice, and spinachSONY DSC

Crispy Quinoa Cakes (burger substitute)

The other day I was trying to convince myself that I did NOT need to eat my 3rd burger of the week… I was losing this self-argument, but in a lightbulb of genius I decided to make quinoa patties. I had been thinking about quinoa and black bean vegetarian patties for a few days, so I thought it only natural to use what I had in the house already. I pulled inspiration for these “cakes” or “patties” from here and here. Have you read Yummy Supper before? Excellent pictures, excellent inspiration, and the name is so adorable!! The other blog is a new find, and I’m excited to read more from it!

SONY DSC

Crispy Quinoa Cakes (Inspired from Yummy Supper and EYS)

  • 1 cup of uncooked quinoa
  • 2 carrots
  • 2 stalks of celery
  • 1 small onion
  • 1 small bunch of parsley
  • 1 cup of cooked brussel sprouts
  • 1 cup of shredded cheese (I used some random raspberry beer cheddar I had languishing in the fridge, but I imagine anything would be good in this! I’m going to try feta next time)
  • 3 eggs whisked
  • Salt/Pepper to taste
  • 1/2 cup of flour (optional)
  • 1 cup of olive oil (maybe a little less)
  1. Wash the quinoa and drain well (I find that unless you give the grains a good scrub you end up with a little sandiness so I’m sure to wash them really well and drain in a mesh sieve). 
  2. In a saucepan, bring the quinoa to a boil in 2 cups of water. Once the water boils, lower to a simmer and put a lid on it (bahaha… put a lid on it). And let it cook until fluffy (about 20 minutes).
  3. While your quinoa is cooking, get started on the vegetables.
  4. Dice the celery and onion. Put into a large mixing bowl.
  5. Slice the brussel sprouts. I used pre-roasted brussel sprouts, but you could use frozen ones or whatever other green vegetable you have on hand. Add to the mixing bowl.
  6. Chiffonade the parsley and add to the bowl
  7. Grate the carrots, using the large holes on your grater, into the mixing bowl with the other vegetables.
  8. Once your quinoa is done, add to the bowl and stir until evenly incorporated.
  9. Add in the whisked eggs, shredded cheese, and salt/pepper.
  10. Shape the mixture into patties. I used about 1/3 cup of the mixture for each cake (this makes about 16 cakes)
  11. (OPTIONAL: You can dust the patties lightly in flour before frying them, it helps a little with cohesiveness, but I fried with and without flour… so it’s really up to you.)
  12. In a frying pan (I used a non-stick one), heat the olive oil until a little bit of batter sizzles.
  13. Taste the little sample batter and adjust your seasonings accordingly.
  14. Fry the cakes in small batches, allowing them to brown before flipping them. I cooked mine for about 4 minutes on each side.
  15. I let them drain on a cookie cooling rack.

I ate my quinoa cakes with seared scallops and packed the rest of the cakes in a large container with pieces of parchment paper in between layers. To reheat, I simply put them in a frying pan and reheated for a few minutes with a teaspoon of olive oil. These keep well in the fridge for up to a week, but I doubt they will last that long.

SONY DSC

SONY DSC

SONY DSC

Let me know if you have any other questions! I think my recipe might be a little garbled, but I made these in a frantic and starved state (and I’m writing it in the middle of the night)!!

SONY DSC

Burnt is Better

Remember a while back I mentioned stuff on how to roast vegetables MY way? Well, I wanted to revisit how to roast vegetables because it is SO easy and really an amazing way to get tons of vegetables into your diet. Winter vegetables can get old REALLY fast. I mean… how much kale and squash can you possible consume before you lose it and resort to stuffing your face with chocolate and cheeseburgers (maybe not together though…).

Anyway… I like my vegetables to get this unbelievably golden (almost burnt) salty crust on them before gobbling them up with some protein (sausage, egg, steak… anything).  My favorites these days have been cabbage, brussel sprouts, carrots, cauliflower, and sweet potato. You can really roast any type of vegetable like this… acorn squash, butternut squash, radishes, beets… anything.

My oven and I have come to the understanding that 400 F is the right temperature because it is low enough to get the vegetables soft and chewy, but hot enough to get the edges crispy. I use a good helping of good olive oil (between 1/4 to 1/2 cup of olive oil for every sheet of vegetables). Good salt. And about 60 minutes to 120 minutes depending on how chunky your vegetables are and how “burnt” you like them. I make plenty of roasted vegetables at a time and store them for up to 1 week in a tightly sealed container in the refrigerator. It’s an excellent way to prepare for healthy meals for the entire week.

Obviously… just salt and oil can get a little boring, so there are some add ins to toss with the salt and oil:

  1. Herbs de Provence (oregano, lavender, and some other yummies)
  2. Chopped garlic and parsley thrown in for the last ten minutes of the roast
  3. Chunky slices of onions with root vegetables
  4. Honey glazed – add a few tablespoons of good honey with the salt and honey, and toss to coat the vegetables before roasting
  5. A generous sprinkle of black pepper and pink peppercorns for a zingy punch
  6. Cayenne and red pepper flakes for spicy vegetables

Here are some pictures of the vegetables I’ve roasted recently.

SONY DSC IMG_1006 SONY DSC SONY DSC SONY DSC IMG_1042

What about you guys? How do you like your vegetables? Crispy crispy? Or less?

Baked Sweet Potato

A couple weeks ago, I discovered that chubby coins of sweet potato baked at a high temperature turned into these sweet and chewy discs of sweet potato… and I kept promising that I would post this super easy way to make sweet potato even more delicious. So a couple days ago I was in the kitchen peeling sweet potatoes to take photographs, but then I had a little bit of inspiration and made this instead.

It’s nothing like those sticky sweet sweet potato dishes that grace holiday tables… instead it’s spiced with cumin and mashed with a bit of swiss chard. It’s delicious right out of the oven, but just as good cold out of the fridge. If anything, it tastes even better after an overnight stay in the fridge and the flavors have had some time to meld.

Sweet Potato and Swiss Chard Casserole (Kaprise Kitchen original)

  • 3 medium sized sweet potatoes
  • 1 bunch of swiss chard (I used red swiss chard, but any would suffice)
  • 1 chicken sausage, crumbled
  • 1 teaspoon of cumin
  • 3/4 cup of full fat greek yogurt
  • 1 cup of finely shredded parmesan cheese
  1. Peel and cube sweet potatoes. In a large pot of salted water, boil cubed potato until tender. About 20 minutes. Drain and cool.
  2. Cut swiss chard into 1/2 inch ribbons. In a large pot of salter water, blanch the ribbons until just wilted. About 2 minutes. Drain and squeeze excess water out of swiss chard
  3. In a small sauce pan, brown crumbled sausage. About 5 minutes
  4. In a large bowl, mash the cooked sweet potato, swiss chard, and sausage together. Add yogurt and cumin and stir until combined.
  5. Spread mixture into casserole dish, top with cheese, and bake at 400 degrees F for 30 minutes, or until heated through.

Potato Chip Pancake

Since I’ve gotten my little mandoline (which I just noticed my computer autocorrected to mandolin in my last post… fear not, I’ve not been cutting my vegetables with a stringed instrument!) I’ve been on a bit of a vegetable slicing kick. It’s just so much fun! Thin little slices! Even slices!

Anyway, last night in a fit of procrastination, I sliced a couple potatoes and onions on my mandoline and made this crunchy potato slice pancake. It resembles potato chips just melted together. It’s delicious!

Potato Chip Pancake (a Kaprise Kitchen procastination special)

  • 1 or 2 medium potatoes, sliced thinly
  • 1 small onion, sliced thinly
  • 1 tablespoon of good butter
  • salt/pepper
  1. Slice the potatoes and onion thinly
  2. In a small pan (non-stick is always helpful), melt butter
  3. Arrange potatoes in overlapping circles from outside in
  4. The first layer should be all potato, with the second and third layers interspersed with onion slices.
  5. Cook at medium heat until the potato slices have begun to adhere to each other. I shake the pan every so often to make sure the slices don’t stick. The steam from cooking the potatoes should release the starch and act like a glue between the slices and onion.
  6. Once the bottom has browned, gently flip the pancake in one fluid motion. If your pan is larger, use two spatulas to make sure you don’t lose any pieces.
  7. Cook until browned on the other side. Add more butter as necessary.

Sprinkle cheese and serve immediately.


Pork Butt (hehehe!!)


I made carnitas! (On a mildly related note, has anyone else noticed that their Mac autocorrects their text? Is this a setting I can change? Because… it keeps correcting my words. So carnitas turns into carnal… wtfffff and when I say OooO! in my chats it changes it to POO! I find this mildly funny, but mostly annoying).

But back to the carnitas… so Homesick Texan’s recipe for carnitas has been on a bit of a blog blitz, and so when I was wandering around a new (and very sweet) grocery store I saw some Boston Butt (tehehe) in the meat case, so I asked the nice butcher to wrap it up for me. I know I’m in my mid-twenties, but I still giggled a little when I had to ask the butcher “Can I please have the second Boston butt on the shelf?”

Anyway. You can read the recipe here at Homesick Texan’s website. The carnitas were delicious, but I have a couple notes to make.

  • Because the pork is unseasoned, the pork has a distinct smell. It’s not an unpleasant smell, but I added a few cracks of pepper at the 1 hour mark, and I think that helped. I think swapping out a couple tablespoons of the orange juice for some carrot juice will also help.
  • Add a generous amount of water. I found that the water evaporated at an alarming pace, even when I reduced the heat drastically, so I did add more at the 1 hour mark. However, I think it would be best to simply start out with enough water.
  • Get a generously marbled piece of pork. Mine was quite fatty, but I still felt that more fat needed to have rendered in order for the pork to caramelize properly. If you aren’t able to find a piece of meat that has enough fat, you should consider adding a bit of bacon lard to your pot, or perhaps some duck fat.
  • Place the fatty pieces of pork on the bottom of the pot to help render the fat and prevent sticking.