Mushroom and Artichoke Soup

I’ve been sick the last couple of days, the kind where you are just plain passed out on the couch and drooling. So when I finally managed to peel my tired and sick body off the couch, I wanted something hot and delicious. Luckily, I had a container filled with roasted mushrooms and some spare artichoke quarters languishing in a jar… so I thought… SOUP! Since I was fuzzy from sleeping 2 days straight, I put on some good music and chopped methodically while I simmered up this soup. Turns out, this is just what I needed.

Mushroom and Artichoke Soup (A little bit of this and that from the Kaprise Kitchen)

  • 2 cups of roasted mushrooms (I made mine like this), finely chopped
  • 1/2 cup of canned artichokes (the ones I had are marinated in oil and Italian spices, but plain should be just fine), finely chopped
  • 1 medium sized yellow onion, finely diced
  • 4 cloves of garlic, smashed and finely chopped
  • 2 tablespoons of butter
  • 2 tablespoons of olive oil
  • salt and pepper
  • pinch of cumin, paprika, and whatever other spices you want!
  • 1 cup of water
  1. If you haven’t already, finely chop all of the ingredients.
  2. In a pot, heat the butter and olive oil
  3. Gently stir in the onion, cooking until translucent and sweet. Add the garlic and cook for a few minutes.
  4. Stir in the mushrooms and artichokes.
  5. Add 1 cup of water and bring to a simmer
  6. Season accordingly.
  7. DONE!

Easy Peasy! This is easily made vegetarian by just using olive oil…. I ate mine with some seared scallops, but you can add or leave out protein as you see fit!

photo

I hope you are all staying warm! It’s been freezing out here, and much to my dismay, my dog LOVES being outside in the snow and ice.


Caramelized Peaches with Cinnamon

Oh hi friends. I meant to write you this amazing recipe for garlic scape pasta salad. I made it, tasted and yum-yummed, took pictures, and then put it in the fridge. The next day, I pulled it out for lunch and it was TERRIBLE. Seriously. What a waste of scapes.

Pantyways (I say that in real life… isn’t that embarrassing?) I went to the store and as I was floating past the fruit for the vegetables, these peaches caught my eye. PEACHES. People!!! Peaches are my ultimate food kryptonite because I’m allergic and I LOVE them. And you know I have so little control over my food-related impulses that before I knew it, I had paid and was loading a dozen beautiful and fuzzy peaches into my car.

So, like a lot of things I’m allergic too, I CAN eat them once the items are cooked. Unfortunately for most things this totally ruins it. Like seriously… the point of eating an apple is to get that juicy crunch and the satisfaction of crunching the fruit! CRUNCH man, CRUNCH! (Can you tell I drank a bit of caffeine today???).

Well… let me tell you, my friends, this? This is the absolute way one should consume peaches. I know it’s hot and gross out, but these hot little peach slices are just amazing over coconut ice cream and I don’t get hives from eating them! Win-win!

Now, I have a little convection toaster oven, which makes this particular dessert a snap to make. If you do not have one, feel free to use your oven. I would just suggest batching this baking with some other baking you need to do so that you optimize the time your oven is on and steaming you out of your home.

SONY DSC

Alright… This really isn’t much of a recipe, but it’s amazing!!

Caramelized Peaches with Cinnamon (Kaprise Kitchen’s solution to peaches)

  • 2 large peaches, firm
  • 1 teaspoon of cane sugar
  • 1/2 teaspoon of salt
  • 1 tablespoon of lemon juice
  • 1 teaspoon of cinnamon
  • 1 teaspoon of butter
  1. Slice peaches into 4 slices. I just mine in half and then half again.
  2. Sprinkle each slice with salt
  3. Sprinkle each slice with a little lemon juice and then the sugar.
  4. Dust cinnamon over the slices
  5. Dot the surface of the peaches with butter
  6. Bake at 400 degrees on a parchment lined pan for 50 minutes.
  7. Enjoy. Seriously… you should let it cool for like 10 minutes so you don’t burn yourself because I have a fat lip from burning it with peaches. True story bro.

SONY DSC SONY DSC SONY DSC SONY DSC SONY DSC SONY DSC

Grilled Nectarine Coconut Lemon Chia Seed Ice Pops

What a mouthful!!!

Do you say ice pop or popsicle? The area I grew up in has some quirky vernacular, or so I’m told. When I first moved to Baltimore, someone told me that I spoke funny. Haha.

Anyway. I’ve been looking at ice pop recipes all over the internet and really getting into them, but when I saw Joy’s gorgeous Roasted Strawberry Popsicles I immediately got my butt in gear to make them. I didn’t have a popsicle mold, so I spent the better part of the morning hunting one down. The one I found at the craft store was hideous, but I found this adorable one at Marshall’s. It was 2xs more expensive… but you know, I have little control over my food-related impulses. Very little.

SONY DSC

Right on. Here we go.

Grilled Nectarine Coconut Lemon Chia Seed Ice Pops (Inspired by Joy)

  • 13.5 ounces of whole coconut milk (about one can)
  • 1/4 cup of chia seeds
  • 2 tablespoons of maple syrup
  • Zest of one organic lemon
  • Juice of one organic lemon
  • 1 nectarine, sliced
  • 1 teaspoon of coconut oil, melted
  1. In a medium bowl, whisk together the coconut milk, chia seed, maple syrup, lemon juice, and lemon zest until well combined.
  2. Set aside the chia/coconut mixture
  3. Heat up a the grill (or you can just use a broiler!!).
  4. Brush the nectarine slices with some coconut oil, and grill for a few minutes on each side, until tender.
  5. Once your nectarine slices have cooked, chop them into bite size pieces and mash just lightly in a small bowl
  6. Once the chia seeds have plumped up (it took mine about 40 minutes), begin assembling your pops
  7. Start with the chia/coconut mixture, tapping the ice pop forms gently on the table to remove air bubbles. Add a spoonful of nectarine, tapping gently to remove bubbles and get even layers.
  8. Freeze for several hours, or until set.
  9. Serve!!!
  10. My ice pop mold is quite small, but I saved the remaining chia/coconut mixture in the refrigerator and refill the molds as I eat the pops.

Enjoy!!!!!


SONY DSC SONY DSC SONY DSC SONY DSC


Itty Bitty One Bite Calzones (Kinda…)

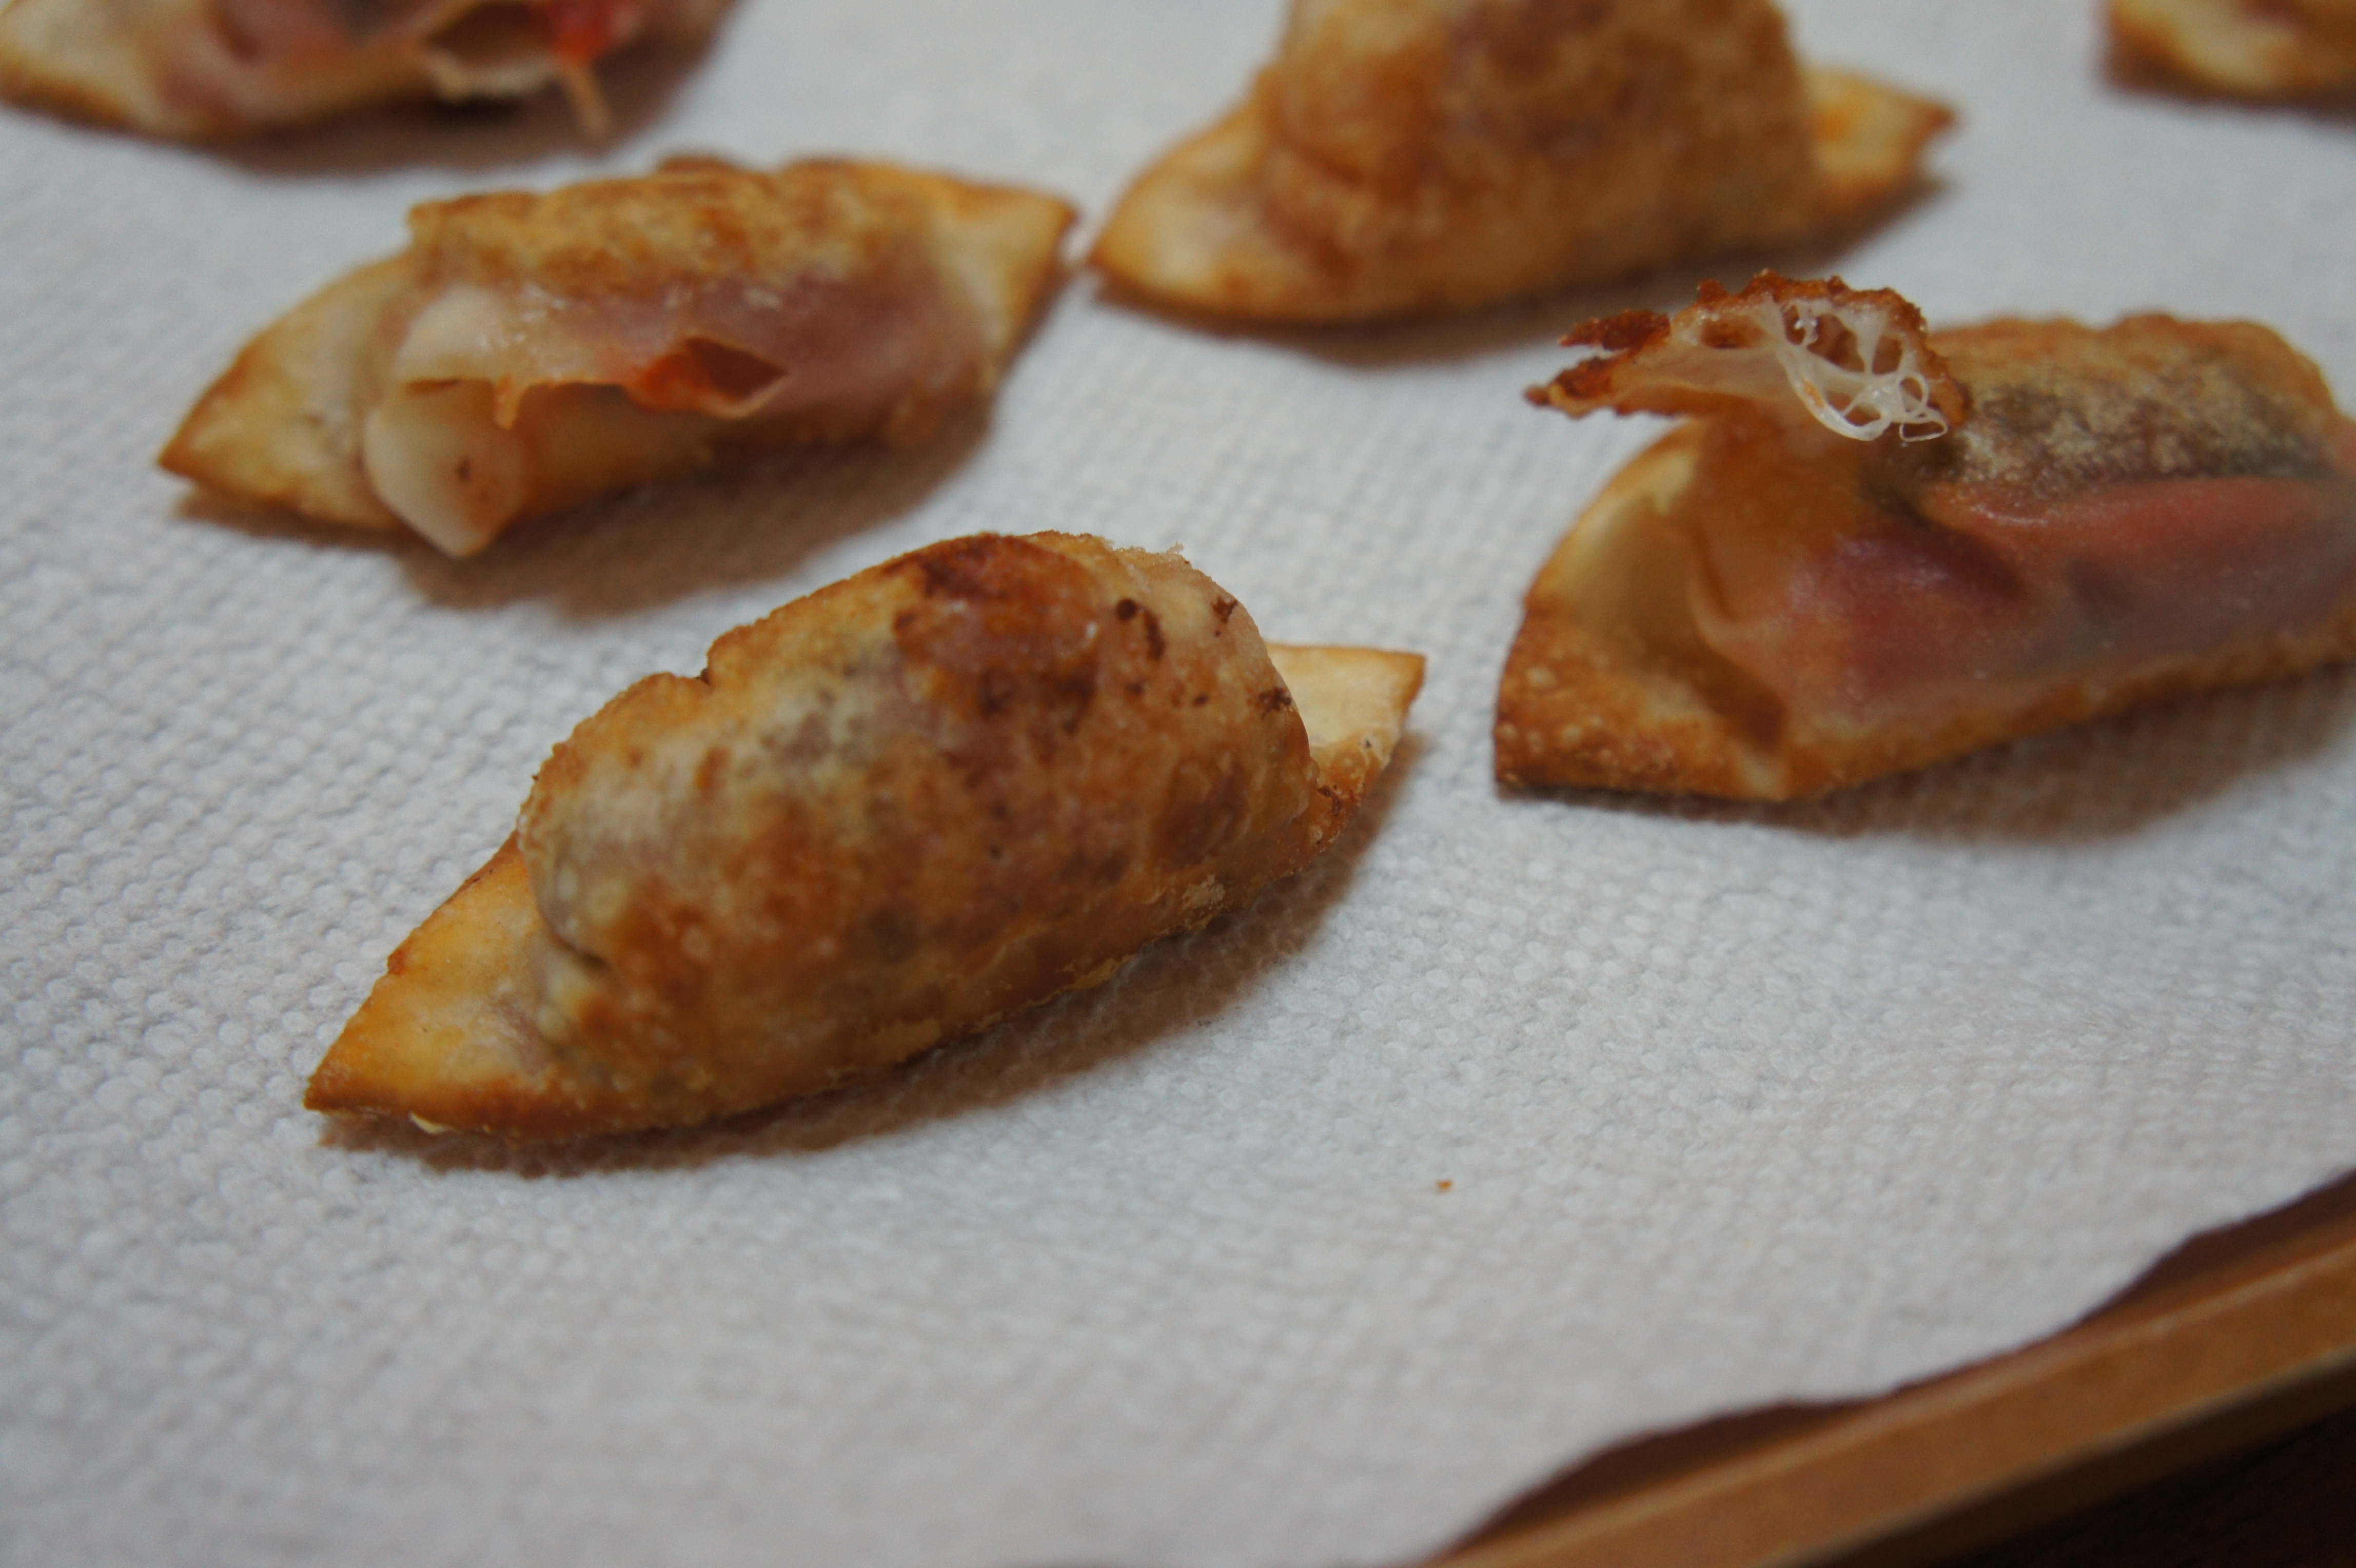
You guys. I did a bad thing. I made these… and instead of sharing? I ate them all.

SONY DSC

So. First, these aren’t calzones. Sorry if I roped you in based on that information. Misleading title huh? But I didn’t actually know what to call these little things because they aren’t dumplings, or calzones, or really anything. Instead – it’s just a crispy shell filled with mozzarella and tomato sauce… which is really what a calzone is, but baked. These babies are fried.

Anyway… before we get to the recipe, as always I have some rambling to do (you love my rambles, you do!). In college, I used to order a pizza, sit, and eat each and every single piece by myself while I studied. I could normally polish off the entire pizza in an hour, sometimes longer if I was actually studying. Well, one day my best friend Corinne caught me in the act and to this day, she won’t let me live it down. She thinks it’s hilarious that I used to regularly stuff down entire pies of pizza. Small confession: I definitely did this in my last year of law school.

Oh right… back to the calzone-things. There used to be a delivery place that would deliver amazing calzones at my undergrad. I don’t know if they still do and it’s been so long that the name escapes me… but Corinne and I used to eat calzones in the library, hung over, and working. I know… I’m painting such an attractive picture of my college years, aren’t I? So, I’ve been thinking about teeny ones, like one bite calzones for the longest time because everyone likes finger food. And, for me, I like more sauce and more cheese and less bread than a normal calzone offers. Originally, I thought about doing this little recipe in actual yeast raised pizza dough, but then I forgot to buy yeast. So then I was thinking pie crust, but I got lazy and decided on wonton wrappers. I always have a package or two of wonton wrappers in my freezer, so it worked out. I’m cleaning my fridge and making my food-dreams come true.

Right on. Here we go. So before we get started, I highly recommend using a splatter guard. It’s one of those mesh things that you pop over the top of frying pans to prevent oil splatters. I really debated on making these at all because frying anything “wet” like tomato sauce can be a HUGE problem and lead to really dangerous splattering oil. And then after I made them, I debated on posting them here, because I don’t like the idea that anyone makes something I recommend and gets hurt. However… I decided as I was cleaning that you are ALL adults and I am giving you the appropriate warning so there it is. BE CAREFUL!

Kaprise Kitchen’s Itty Bitty One Bite Faux Calzones

  • 2 Mozzarella sticks
  • 16 small circular wonton wrappers
  • 1/4 cup of chunky tomato sauce*
  • 1/4 cup of vegetable oil

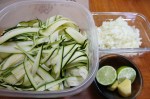
*** I recommend using the chunkiest sauce you have so that you can eliminate the more fluid and liquid-y parts of your sauce. I made sauce from whole canned tomatoes a few days ago, so I used the chunks of tomatoes from that sauce only. The reason for this is that in case your wrapper leaks as you fry, the sauce won’t hit the oil and turn into a fountain of spluttering hot oil.

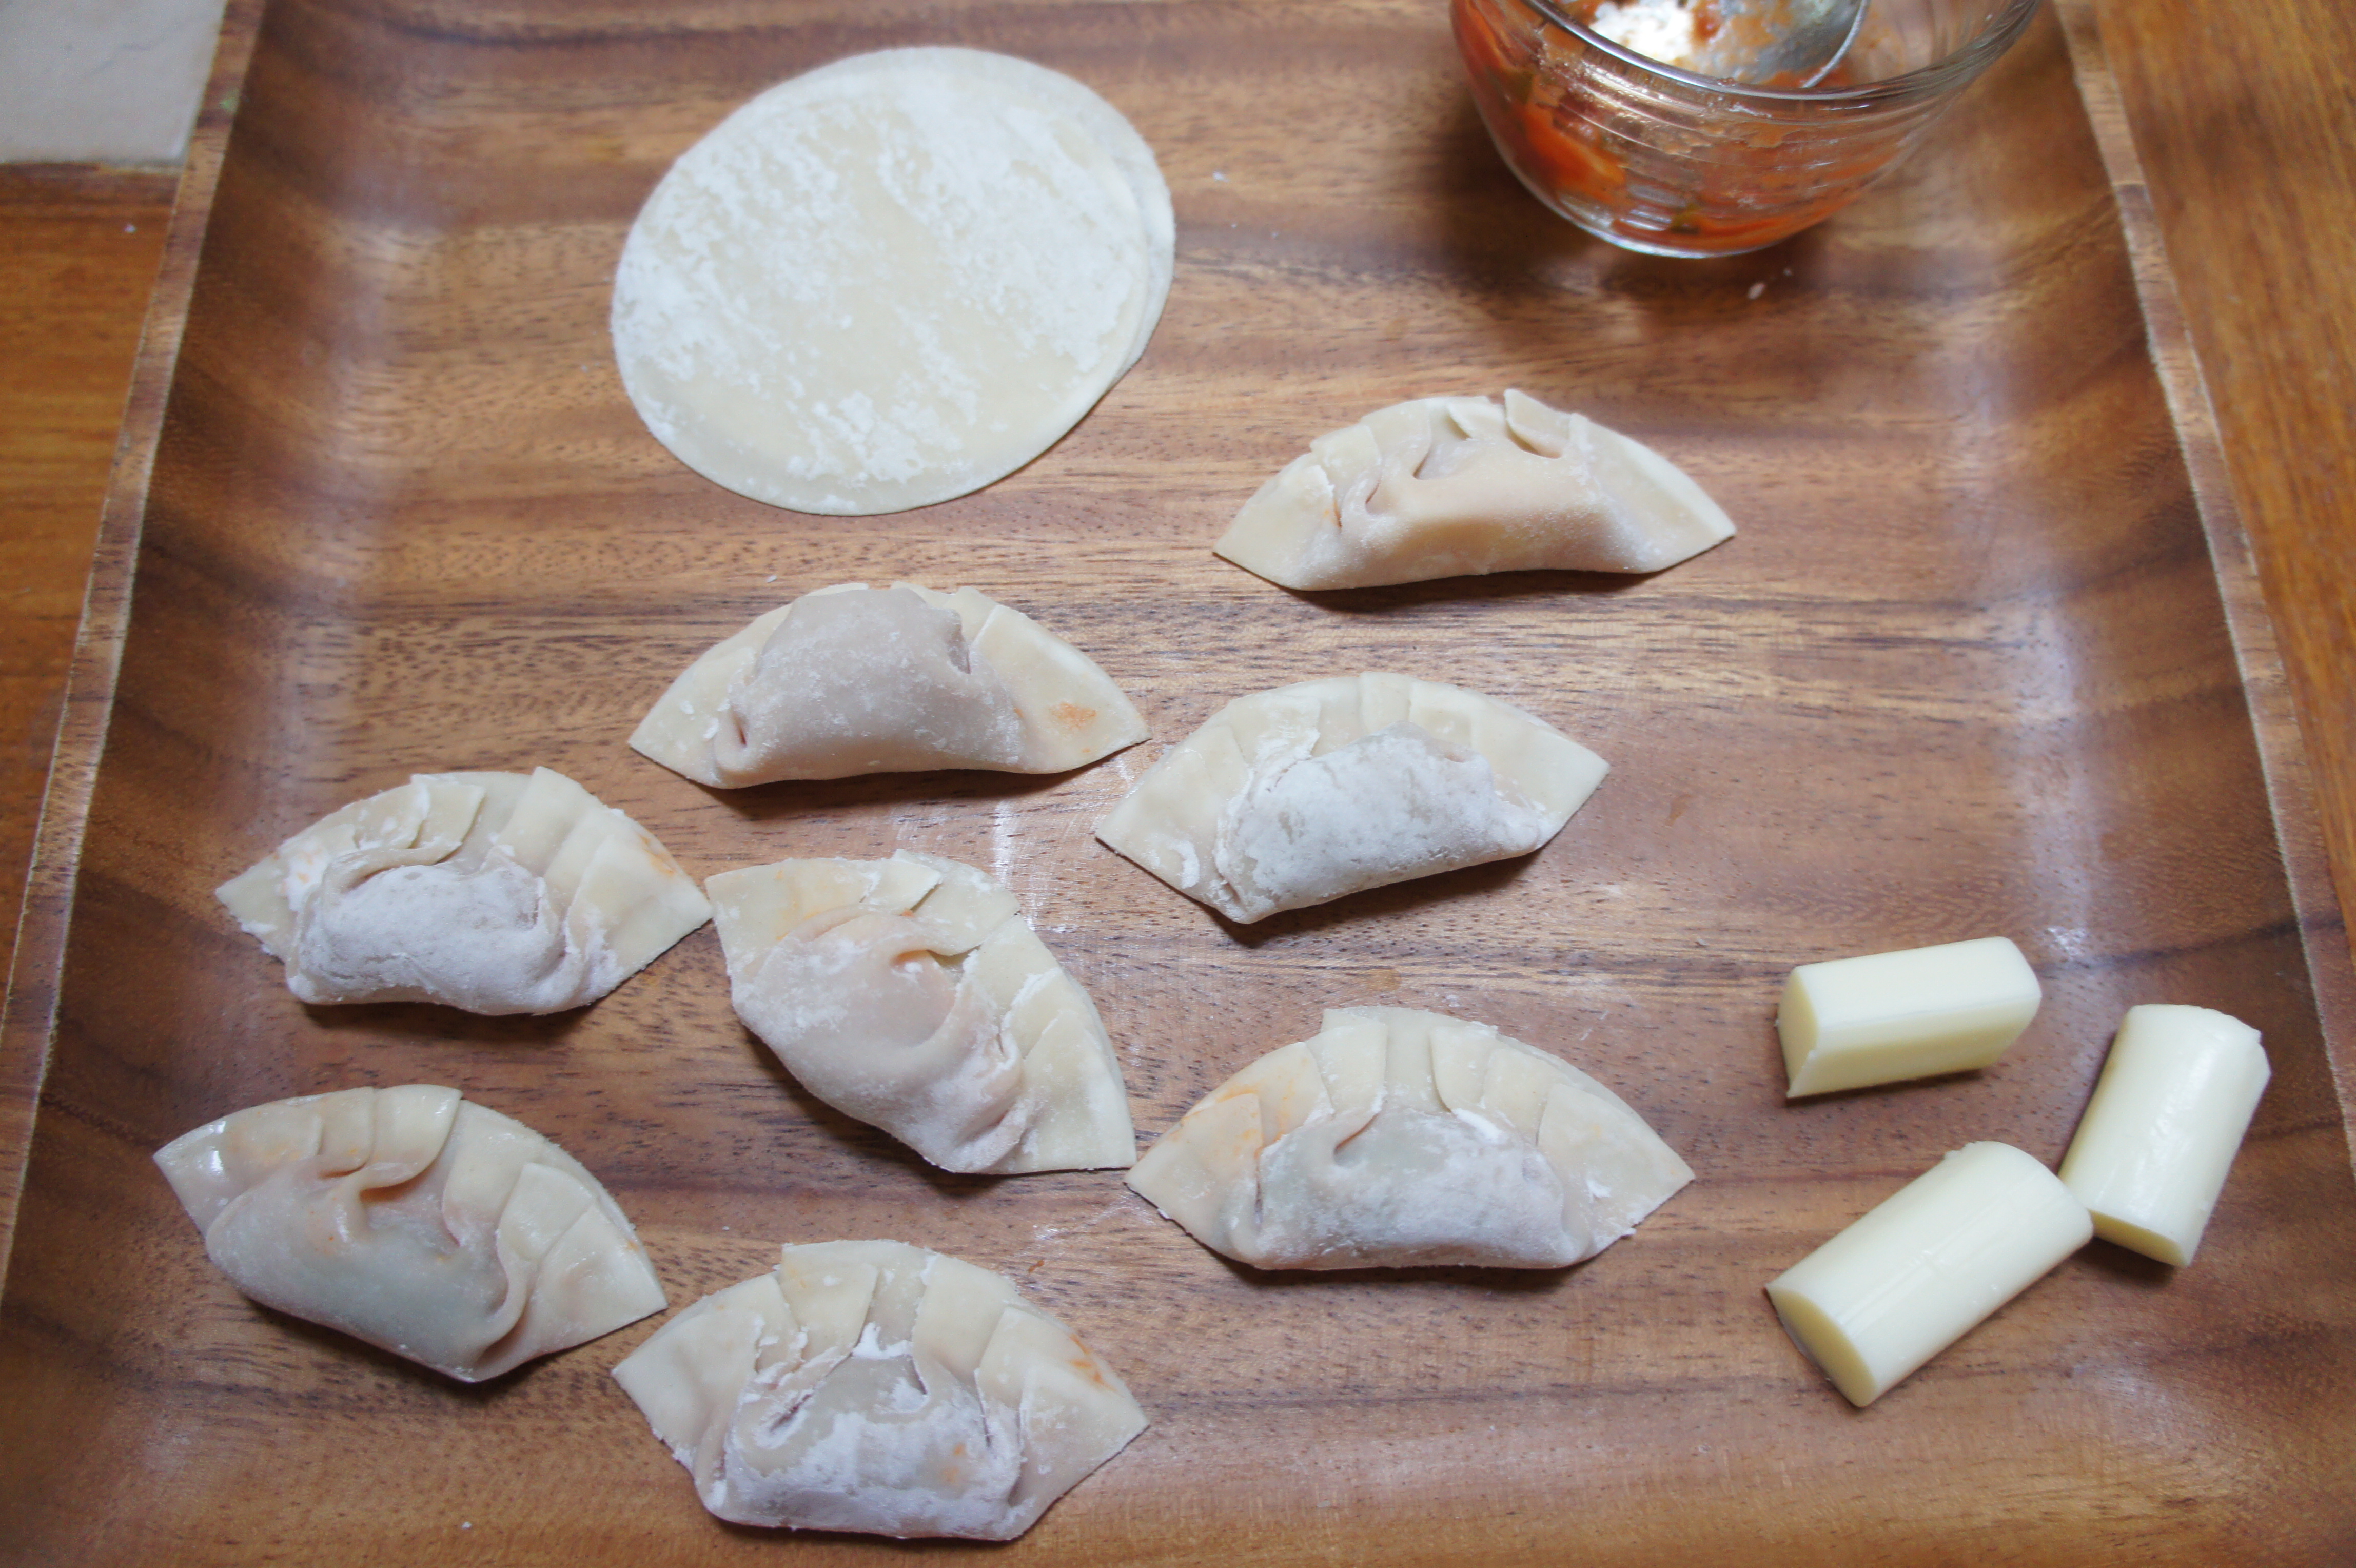
  1. Cut the mozzarella sticks down the length and then into fourths. You should get 8 thin rectangles from each stick (16 total)
  2. Lay out the wonton wrappers and place one mozzarella segment in the center of each
  3. Using a small spoon, add a small dollop of sauce on each circle
  4. Seal the circles with a dab of water and press firmly so that the wrappers are 100% sealed. You want to give yourself a little room as you seal these. The sauce and cheese will puff a bit as you cook so you should give them room to move around without breaking the seal of the wrapper.
  5. In a pan, heat the oil and drop a piece of wrapper in to check the temperature. You want a gentle bubble of oil
  6. Gently place each “calzone” into the oil, giving plenty of space
  7. Fry on each side for about 1 minute, or until golden brown.
  8. If cheese or sauce leaks from your wrappers and causes the oil to splutter, step back until the oil has stopped spluttering before removing the little calzone. Better to have burnt food than burnt body parts.

SONY DSC SONY DSC SONY DSC SONY DSC SONY DSC SONY DSC SONY DSC SONY DSC SONY DSC

I hope you enjoy this recipe! I can see this being versatile and becoming as down to earth or as sophisticated as you want. This would even be good with a dollop of goat cheese and fig spread!!

Have a great weekend everyone!

xoxo-H


Listen When I Sing This Song (+ the BEST Baked Ziti)

Today… Today I was ravenous… After my run, I demolished an entire tray of sliced carrots and hummus. Then I ate a cheeseburger. Then I spent three hours thinking about how I was SO hungry. Clearly, my body was telling me to eat something! But then I got super, uber fixated on cheesy pasta. So. I made it.

The first time I had baked ziti was at my friend Deirdre’s house. Her mom asked me to come over to play, and I was SO excited. I shouldn’t have been so excited, the minute I arrived Deirdre and I were planted firmly at the kitchen table and told to work on Algebra together while Deirdre’s mother whipped up dinner. Despite being forced to do homework on my “play” date, I was thrilled because Deirdre’s mother made us this thing called “baked ziti.” I distinctly remember wolfing down more than my fair share. It was hot, cheesey, and absolutely amazing. I loved it.

I made baked ziti for years, and it has always been one of my favorites. I made it for my 16th birthday celebration, but I can’t remember having made it since (… seriously?!).  Anyway, I read a couple recipes on my phone before running through the grocery and grabbing the ingredients. From start to finish it took me about an hour and 15 minutes, but it was an active 1 hour and 15 minutes. Either way, baked ziti is always worth the elbow grease!

Kaprise Kitchen’s So-Hungry-I-Can’t-Focus-On-Anything-But-Food Ziti (inspired by several different recipes online, and Deirdre’s mom)

  • 28 oz can of whole tomatoes (you may choose to use more tomatoes if you like to keep extra sauce for rainy days. I did!!!)
  • 1 bunch of basil
  • 1 bunch of parsley
  • 1 bay leaf
  • 2 tablespoons of chopped garlic
  • 1 yellow onion, minced
  • 2 tablespoons of olive oil
  • salt/pepper
  • 1 pound of uncooked pasta
  • 15 oz of full fat ricotta cheese
  • 12 to 16 oz of full fat mozzarella, shredded (also. seriously. NEVER buy that preshredded stuff. It’s bad. VERY bad)
  1. If your oven takes 10000000 years to preheat, now is the time to fire up that babd boy. 375 degrees F.
  2. In a large pot, bring a large quantity (enough for 1 pound of pasta) to boil. Salt lightly.
  3. In another large pot, heat olive oil over medium heat
  4. Mince the onion (really more of a petit dice) and add to the olive oil.
  5. While your onion is softening, peel and smash about 3-4 cloves of garlic. Chop finely and add to onions. Continue to cook gently, be sure not to let the garlic or onion brown. You just want them to be nice and translucent.
  6. Add tomatoes to the garlic/onion. Break apart the whole tomatoes with a fork. Continue on medium/high heat
  7. While your tomato mixture is heating up, your water should boil. Add your pasta and cook for 2 minutes less than al dente. Set a timer so you don’t forget!
  8. As your tomatoes heat, finely chop your fresh basil and parsley. I added a very generous 1/4 cup of chopped herbs, but feel free to adjust based on your preferences.
  9. Add the herbs to the tomatoes, cover and bring the tomato sauce to a boil. I don’t like to cook the heck out of the sauce, so just as it gets to a boil, I turn the heat off.
  10. Now… your pasta timer should have beeped, so drain your pasta in a colander. Shake the excess water from the pasta and return to the pot.
  11. In the pot, add the ricotta cheese and 1/2 of the shredded mozzarella (I added some more chopped herbs too) and 1/2 of the tomato sauce. Stir until the noodles are evenly coated.
  12. Spread your pasta into a large casserole dish (or two separate ones like I did). Dot the top of the pasta with the remaining tomato sauce. Sprinkle with the remaining mozzarella.
  13. Pop into the over for 20 minutes, or until the cheese has bubbled a bit.
  14. ENJOY!

Leftovers keep well for up to 4 days in a tightly sealed container. When reheating, add a little extra tomato sauce to the pan/plate/whatever to help the pasta perk up a bit.

I would have taken pictures, but I was so busy burning my tongue and wolfing this down that I didn’t. Also. Baked ziti photographs pretty terribly, so I doubt you’re missing much.

What did you eat for dinner?


Gingery Tea Jello

There was a period in time where I made and consumed jello ALL the time. I used to put 7-Up in it to make it bubbly… like champagne! I’d always leave a little water out because I liked my jello firm and bouncy so I could play with it before gulping it down.

SONY DSC

Anyway, I was thinking about jello yesterday, and after doing a little digging I decided I wanted to make my jello with tea like I saw here. I’ve been thinking of ways to get rid of the extra Camomile Citrus tea from Mighty Leaf that I bought when I was sick a couple months back, and this seemed like the perfect idea. You guys also know I’m “kinda” obsessed with ginger these days, so I  added that and some good raw honey I had. Seriously… AMAZING. They are just lightly scented with tea and have an awesome kick of spicy ginger and just a bit of sweetness from the honey. I definitely recommend brewing the tea, ginger, and honey together so you can adjust depending on your person preferences, but here is the formula I used for my little blocks of jello.

Oh… Did I mention that you can look at a ton of super awesome jello ideas here?? And, Victoria is SUPER nice and helpful. She even gave me awesome tips of how to use that Nordic Ware pan I’ve had for months and only used once.

Oh… (2x) did you know that jello is paleo friendly??

Gingery Tea Jello (Inspired by the Domestocrat and Victoria)

  • 0.75 ounces of powdered gelatin
  • 2 cups of boiling water
  • 1 cup of room temperature water
  • 2 tea bags
  • 2 tablespoons of grated ginger
  • 2 tablespoons of raw honey
  1. Bring a pot/kettle of water to boil. You need 2 cups, so make sure to boil enough
  2. In a large heatproof bowl, add one cup of room temperature and 0.75 ounces of powdered gelatin. Stir.
  3. In a teapot, combine two cups of boiling water with your tea bags of choice, raw honey, and grated ginger. Allow the tea and ginger to steep for 5 minutes. Stirring occasionally to break up the raw honey. Taste the mixture and adjust sweetness and ginger accordingly.
  4. Strain the hot tea to remove the grated ginger, and whisk the hot tea into the bowl with the gelatin.Make sure all of the gelatin is completely dissolved.
  5. Pour into molds or into a glass Pyrex (like I did)
  6. Chill for a couple hours, until set, and enjoy!!!

What about you? Do you like jello?? What do you think about this kind of jello?

SONY DSC

Gingery Grilled Avocado and Steak Salad

I’m sure you guys have gathered that I LOVE steak, avocado, and ginger… so naturally I put them all together in this salad for lunch. With ice cold tea, this was the perfect springy lunch. I splurged and bought an organic, grass fed Australian steak.

  • 8 ounces of good steak
  • 1 avocado
  • 3 slices of ginger
  • 1 bunch of arugula (or other lettuce)
  •  1 bunch of sugar snap peas
  • Salad dressing of your choice
  1. Sprinkle steak with good salt and grill. I like mine rare, so I grilled accordingly.
  2. Once your steak has been grilled, let it rest
  3. While the steak is resting, brush the avocado and ginger with a little olive oil. Grill for just a few minutes
  4. Arrange the salad in your favorite bowl and sprinkle with your favorite salad dressing.

*The grilled ginger is rather bitter, but tossed with the salad it imparts a light gingery flavor.

🙂 Enjoy!


SONY DSC SONY DSC SONY DSC SONY DSC SONY DSC SONY DSC

Crisp Salad with Feta, Olives, and Basil

After eating soup and soft hot foods to help kill my cold, I was really craving something fresh, crispy, and refreshing. This salad satisfied my craving, and the remaining leaves of lettuce have been quickly gobbled up with zesty dressing. Since this isn’t much of a recipe, I’ll leave you with a list of the ingredients and a couple pretty pictures of my salad

Crisp Salad with Feta, Olives, and Basil

  • Iceberg lettuce
  • Feta cheese, crumbled
  • Sliced black olives
  • Shredded basil
  • Thinly sliced fennel
  • Sliced carrots
  • Coins of roasted sweet potato
  • Avocado
  • Cherry tomatos
  • Italian dressing

SONY DSC

SONY DSC

Double Dose of Vegetables Pad Thai

I went to Thailand last year, and for someone who had not really appreciated Thai food, I came back with an extremely healthy appetite for Thai food. Unfortunately, New York is not a bustling metropolis that contains much Thai food (please correct me if I’m wrong! I haven’t been able to find anywhere to remotely resembles delicious Thai food!).

My sister introduced this recipe to me a year ago, and it has been on steady rotation in my cooking repertoire. The recipe is simple and the result is a stunningly delicious rendition of Pad Thai. You can find the complete recipe at Health-Bent, an extremely well written and thought out Paleo blog with gorgeous pictures and recipes. Health-Bent’s Paleo Pad Thai.

Here are some pictures from my latest run at Paleo Pad Thai.


I normally make a double batch and store it in the refrigerator in 1 serving portions. I just grab a container at a time and toss it with some grilled shrimp or chicken over high heat and eat! Quick and delicious way to get your protein and vegetables in one delicious bowl!

Oh… and in case you find yourself in Bangkok? This is the Pad Thai I am raving about! It is seriously amazing.

SONY DSC

You can find this Pad Thai in Bangkok at  Pad Thai Thip Samai (aka Pad Thai Pra-Too Pee). Located at Khaosarn Road. Here is the address and website:  313 Mahachai Road, Phra Nakorn (http://www.thipsamai.com/)

Teeny Milk Biscuits

Years and years ago I remember reading about this place in the South that made legendary biscuits. I remember reading in the article that the key to the biscuits was a specific type of flour… White Lily. Anyway, I recently dug up the recipe online, and in a strike of luck I just happened to have milk in my refrigerator when the mood struck me to make these biscuits.

IMG_1793

I have been trying to cut down on the wheat in my life, but I do have a soft spot for fluffy biscuits. I especially like my biscuits slathered in good butter and tart jam. Since the presence of milk is rare in my refrigerator, it was even more auspicious that I happened to have a tablespoon of peach apricot jam and extra Kerrygold butter to smother my little biscuits with.

Teeny Milk Biscuits (adapted from the Carriage House Recipe)

  • 2 cups of White Lily flour (I’m sure you can use all purpose here, but you may need a bit more milk)
  • 4 teaspoons of baking powder
  • 1/4 teaspoon of salt
  • 2 tablespoons of sugar
  • 5 tablespoons of good quality butter, popped in the freezer for 15 minutes
  • 3/4 cups of milk (more as needed)
  1. Combine flour, baking powder, salt, and sugar in a mixing bowl
  2. Dip your chunk of butter into the flour mixture and grate it into the flour mixture, dipping as you go to prevent sticking to the grater
  3. With a whisk, stir the mixture together and pop the whisk up and down until the grated butter and flour resembles coarse crumbles.
  4. Add 1/4 cup of milk at a time, until the dough is combined into a soft dough. Add a tablespoon or two more to achieve the proper consistency. Your dough should be cohesive, but soft and sticky
  5. On a well-floured surface roll out the dough. Fold into third and roll out until 1/4 to 1/2 inch thickness is achieved.
  6. Cut with a small round biscuit cutter. I used a 1 1/2 inch diameter one for perfectly petite biscuits.
  7. Place on a parchment covered sheet and brush the tops with another tablespoon or so of milk.
  8. Bake at 400F for 15 -20 minutes until perfectly golden brown
  9. Serve immediately with butter and jam.
  10. These keep well in a sealed container for up to 1 week, be sure to let them regain their crisp with a quick visit back in the oven for 10 minutes at 400F.

I imagine these biscuits would also be perfectly delicious in a more savory application – scale back the sugar and throw in a little cheese and spice for a savory biscuit! Let me know how yours turn out!!

SONY DSC