Burnt is Better

Remember a while back I mentioned stuff on how to roast vegetables MY way? Well, I wanted to revisit how to roast vegetables because it is SO easy and really an amazing way to get tons of vegetables into your diet. Winter vegetables can get old REALLY fast. I mean… how much kale and squash can you possible consume before you lose it and resort to stuffing your face with chocolate and cheeseburgers (maybe not together though…).

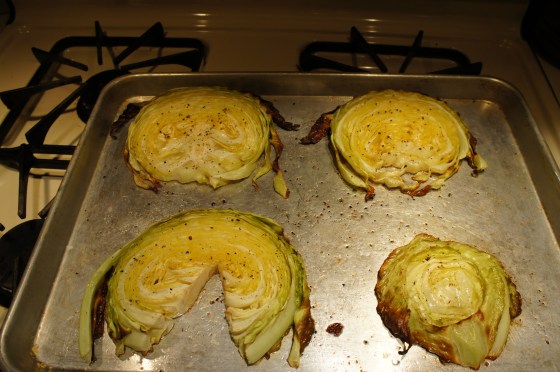
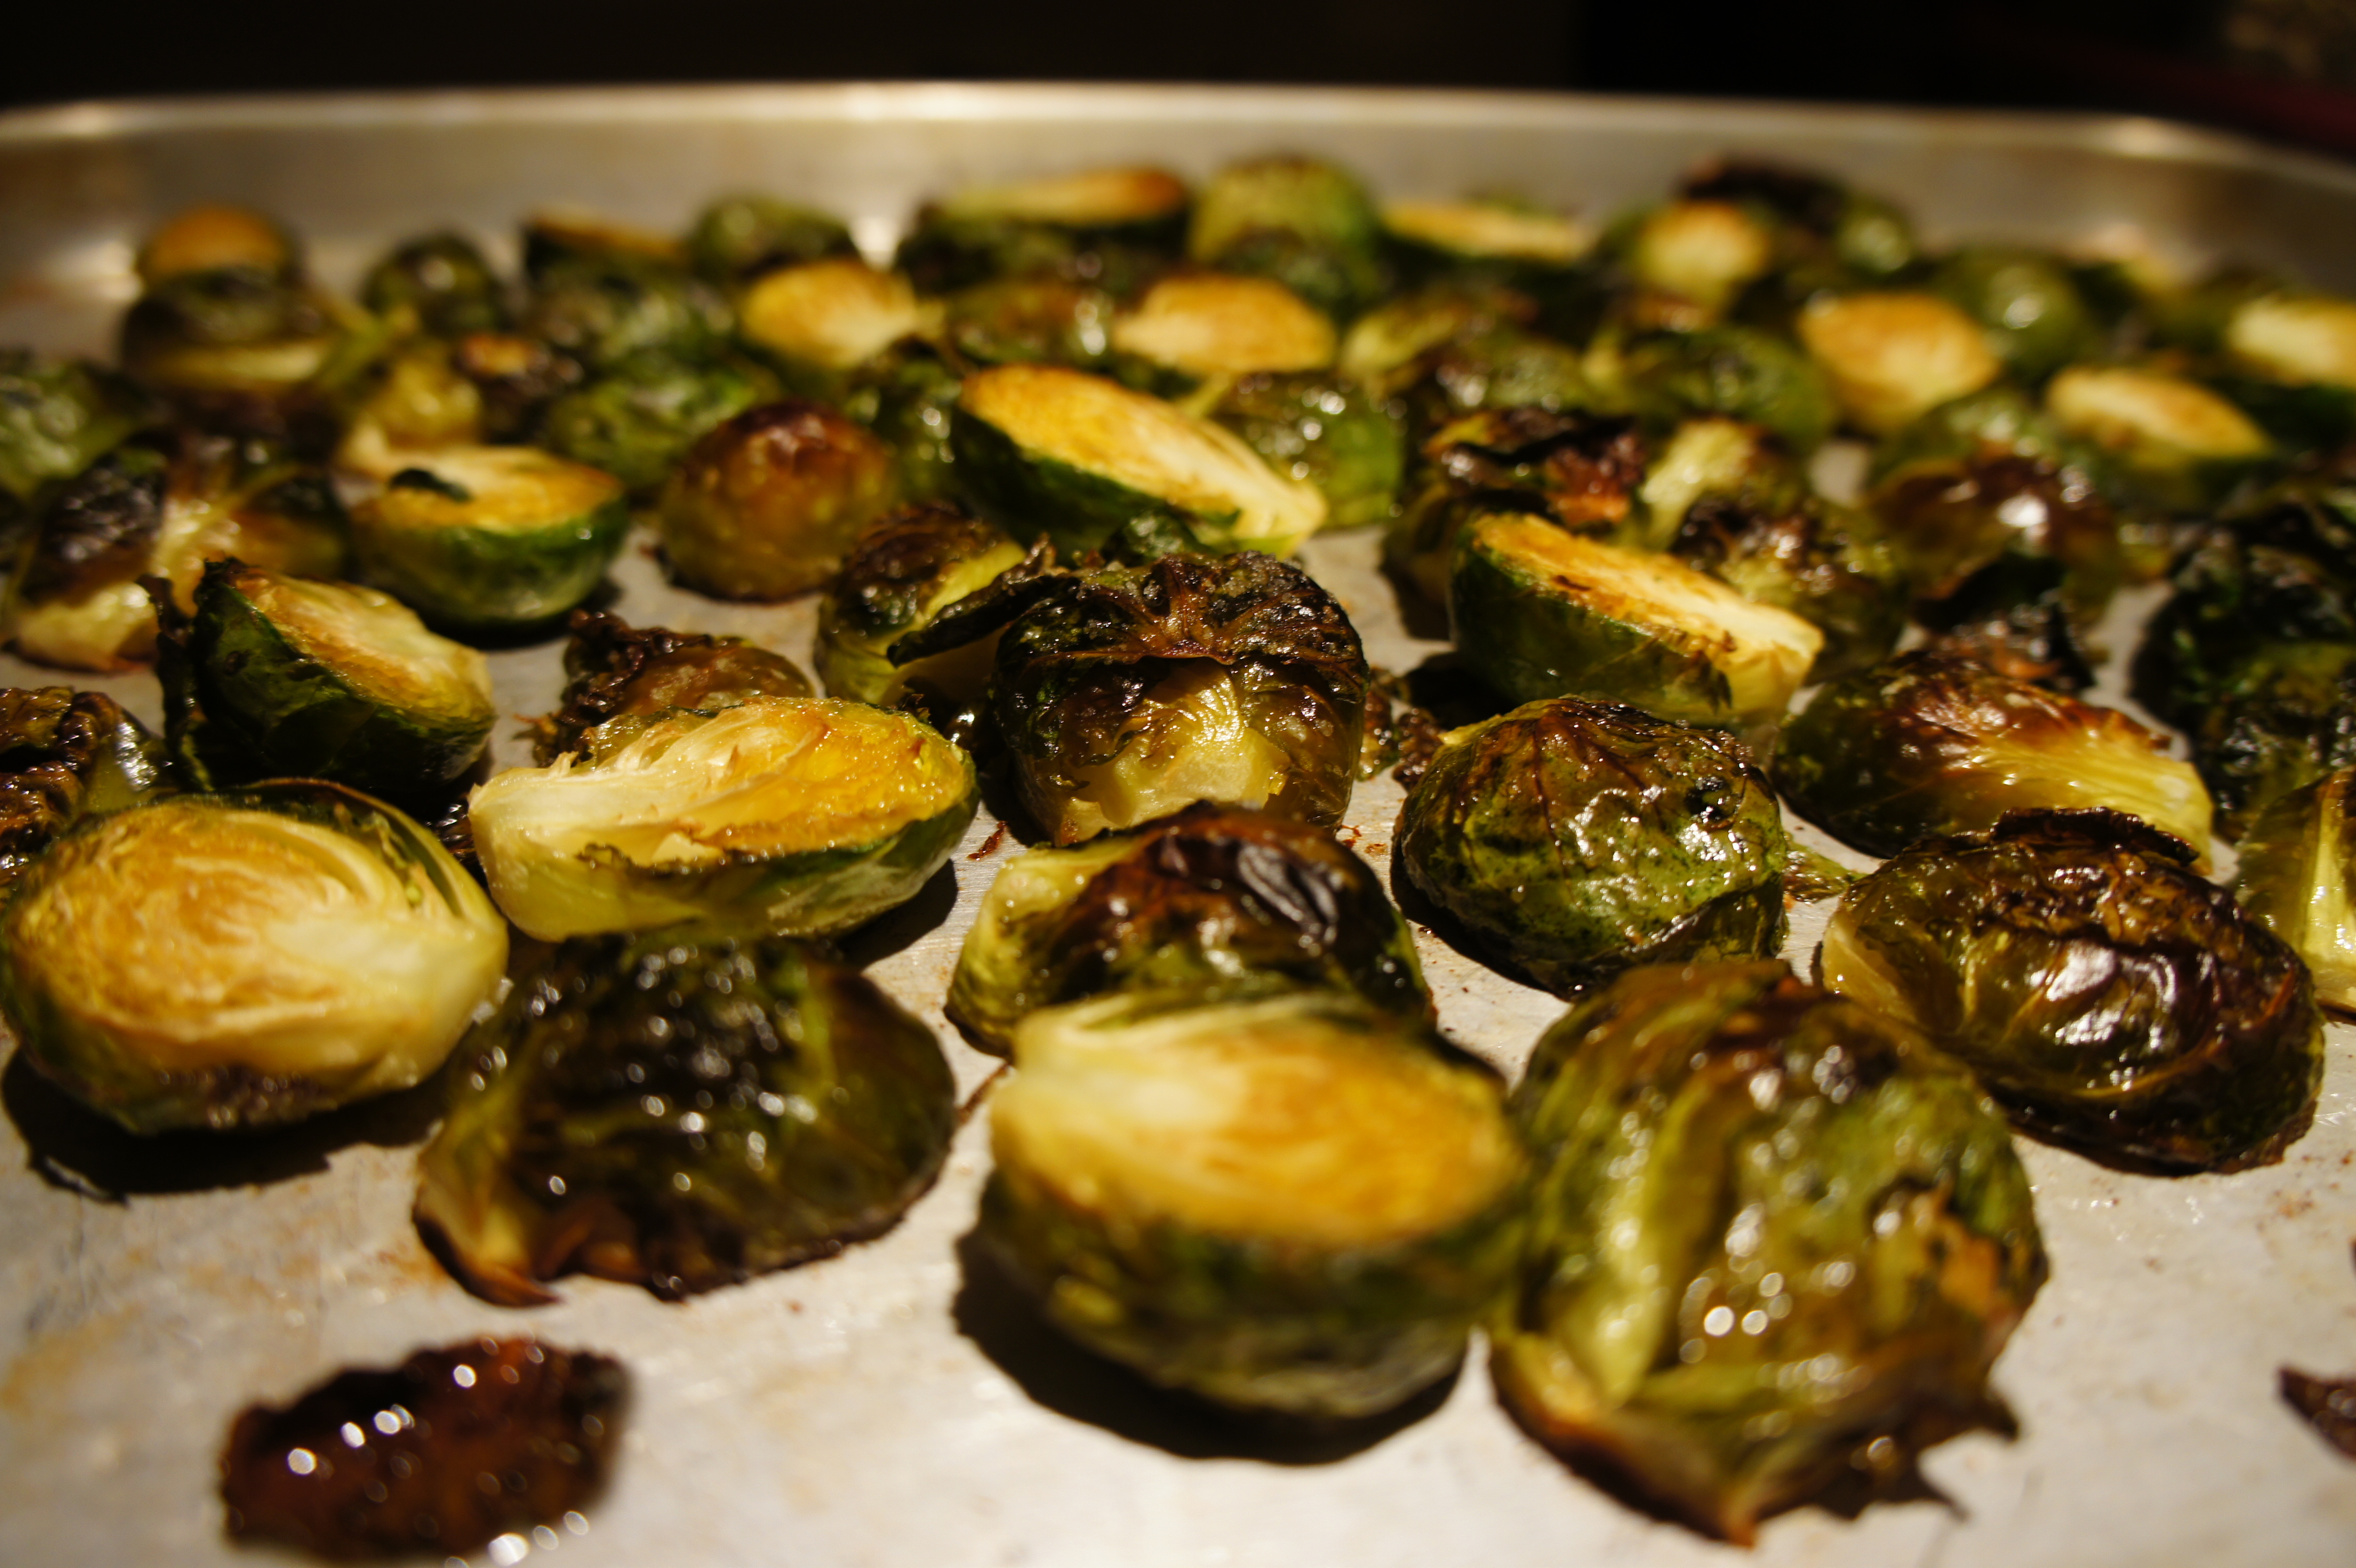
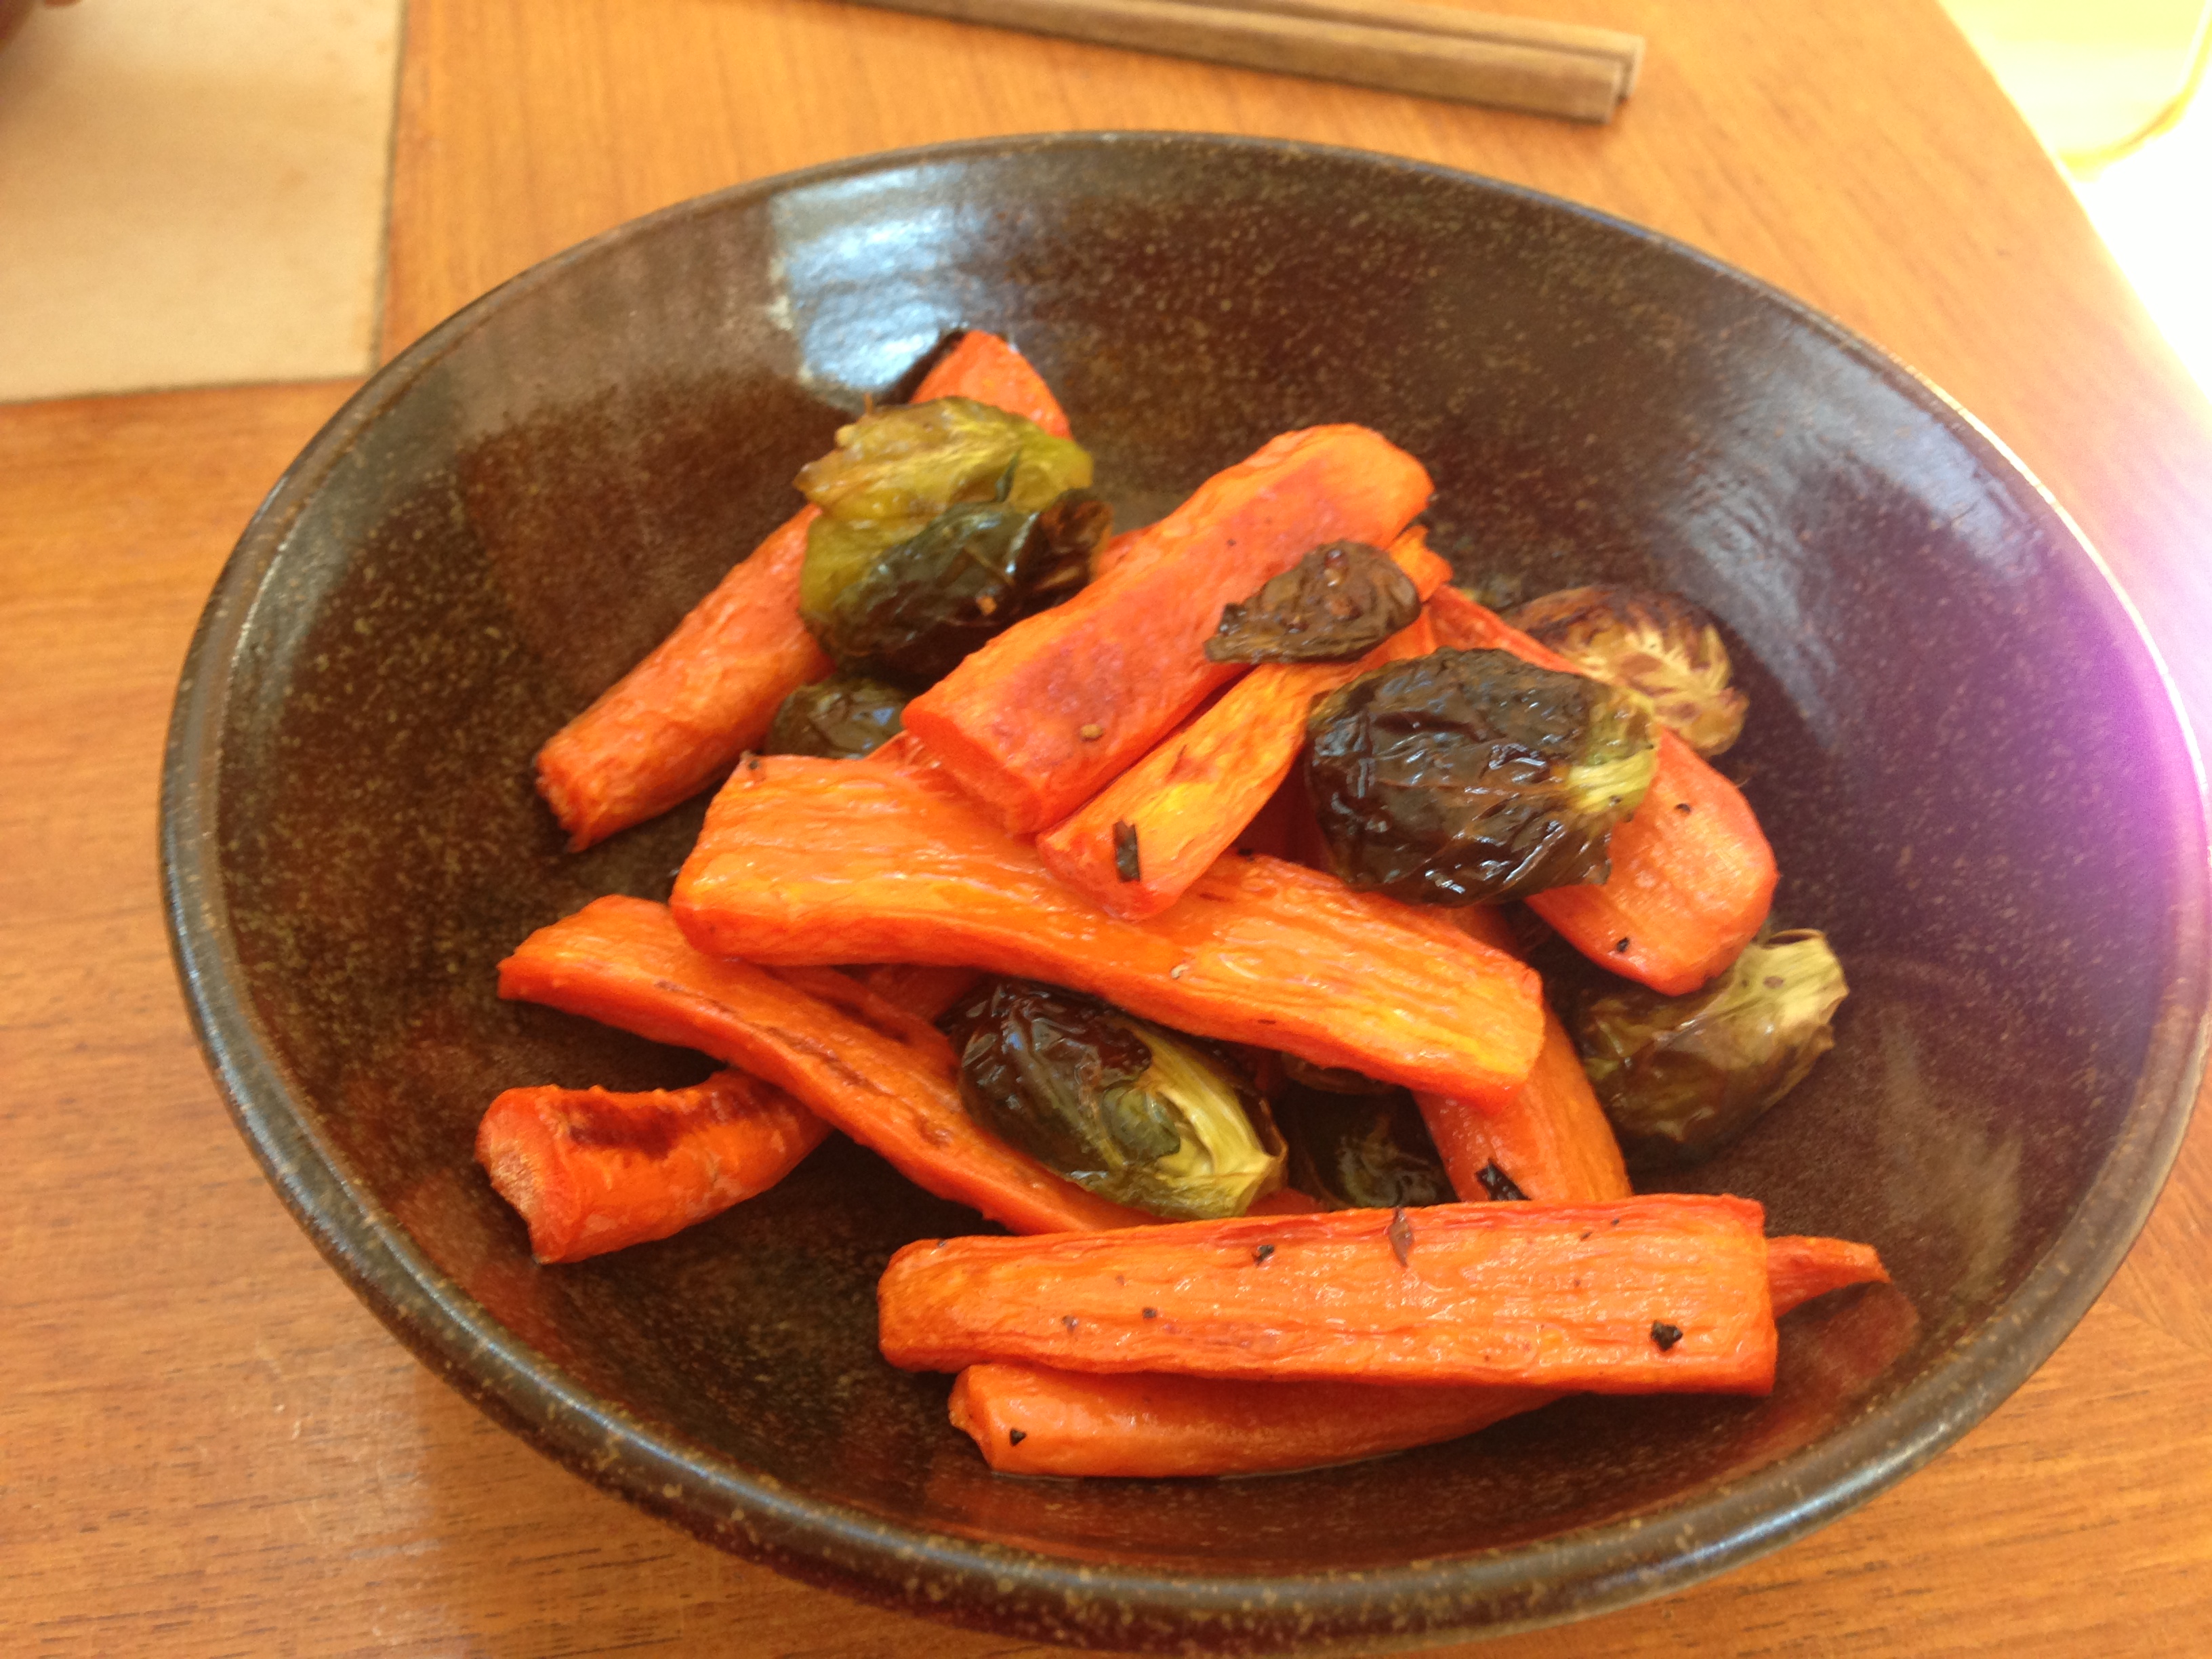
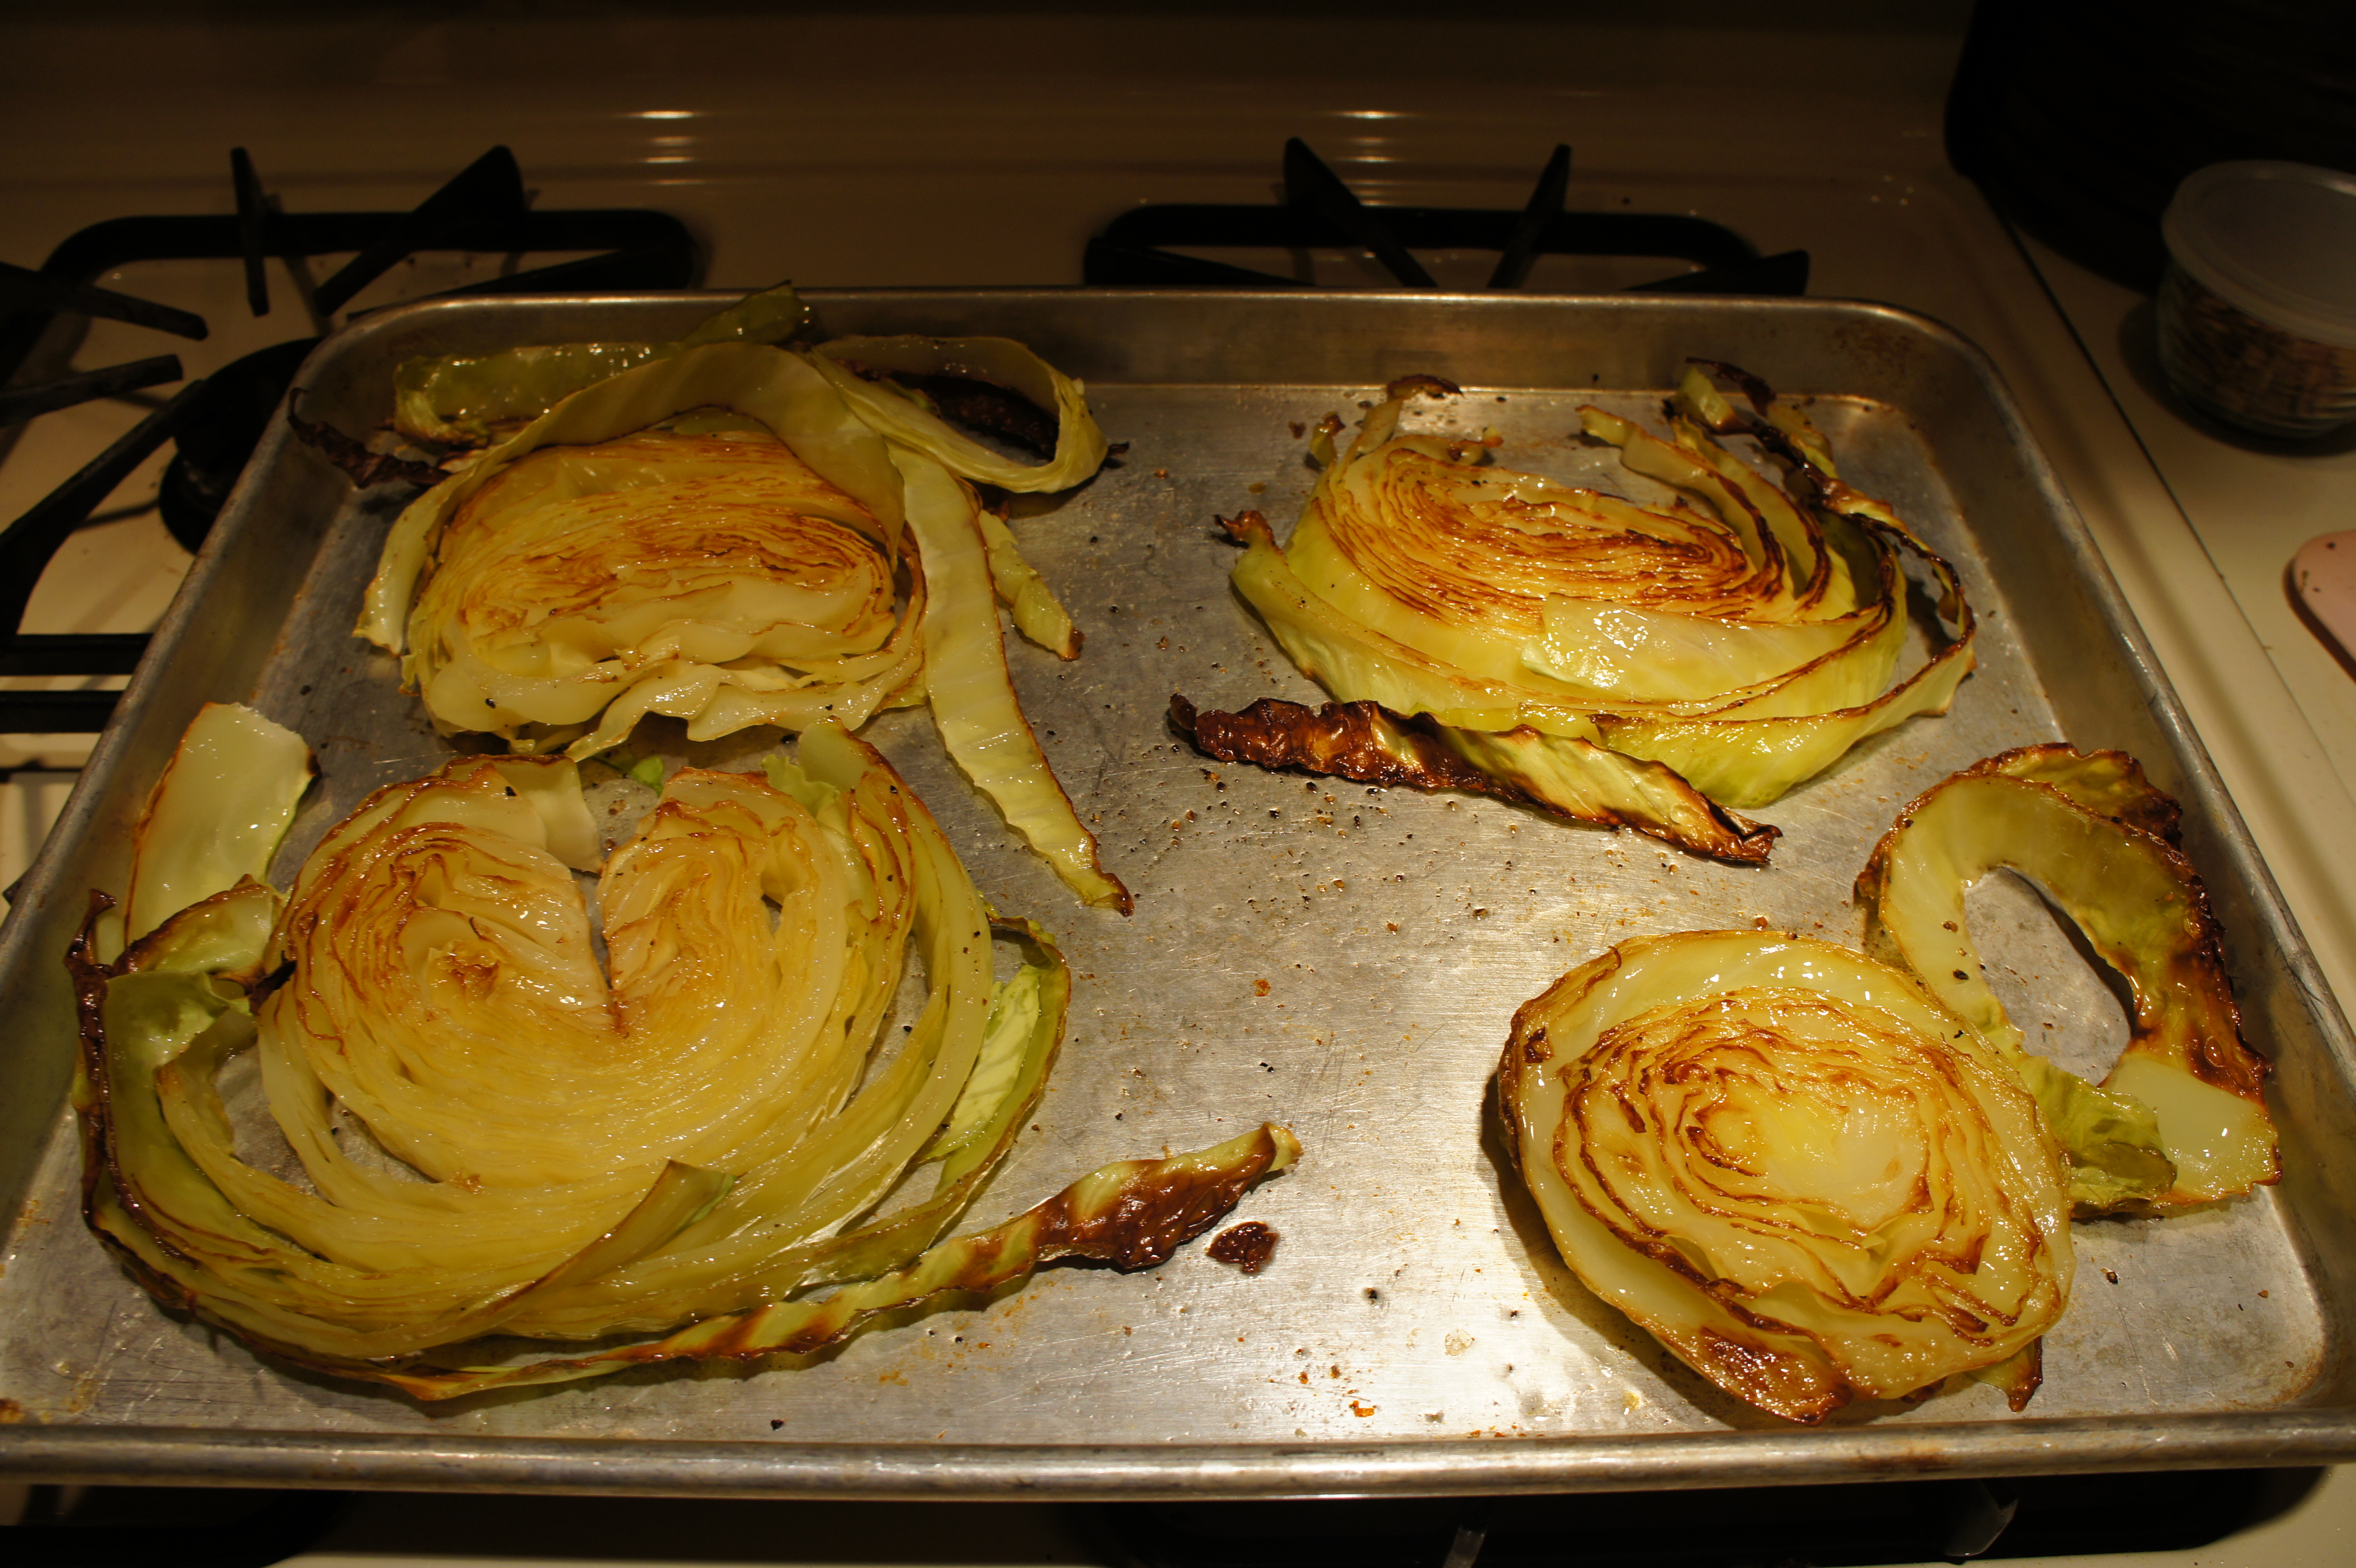
Anyway… I like my vegetables to get this unbelievably golden (almost burnt) salty crust on them before gobbling them up with some protein (sausage, egg, steak… anything).  My favorites these days have been cabbage, brussel sprouts, carrots, cauliflower, and sweet potato. You can really roast any type of vegetable like this… acorn squash, butternut squash, radishes, beets… anything.

My oven and I have come to the understanding that 400 F is the right temperature because it is low enough to get the vegetables soft and chewy, but hot enough to get the edges crispy. I use a good helping of good olive oil (between 1/4 to 1/2 cup of olive oil for every sheet of vegetables). Good salt. And about 60 minutes to 120 minutes depending on how chunky your vegetables are and how “burnt” you like them. I make plenty of roasted vegetables at a time and store them for up to 1 week in a tightly sealed container in the refrigerator. It’s an excellent way to prepare for healthy meals for the entire week.

Obviously… just salt and oil can get a little boring, so there are some add ins to toss with the salt and oil:

  1. Herbs de Provence (oregano, lavender, and some other yummies)
  2. Chopped garlic and parsley thrown in for the last ten minutes of the roast
  3. Chunky slices of onions with root vegetables
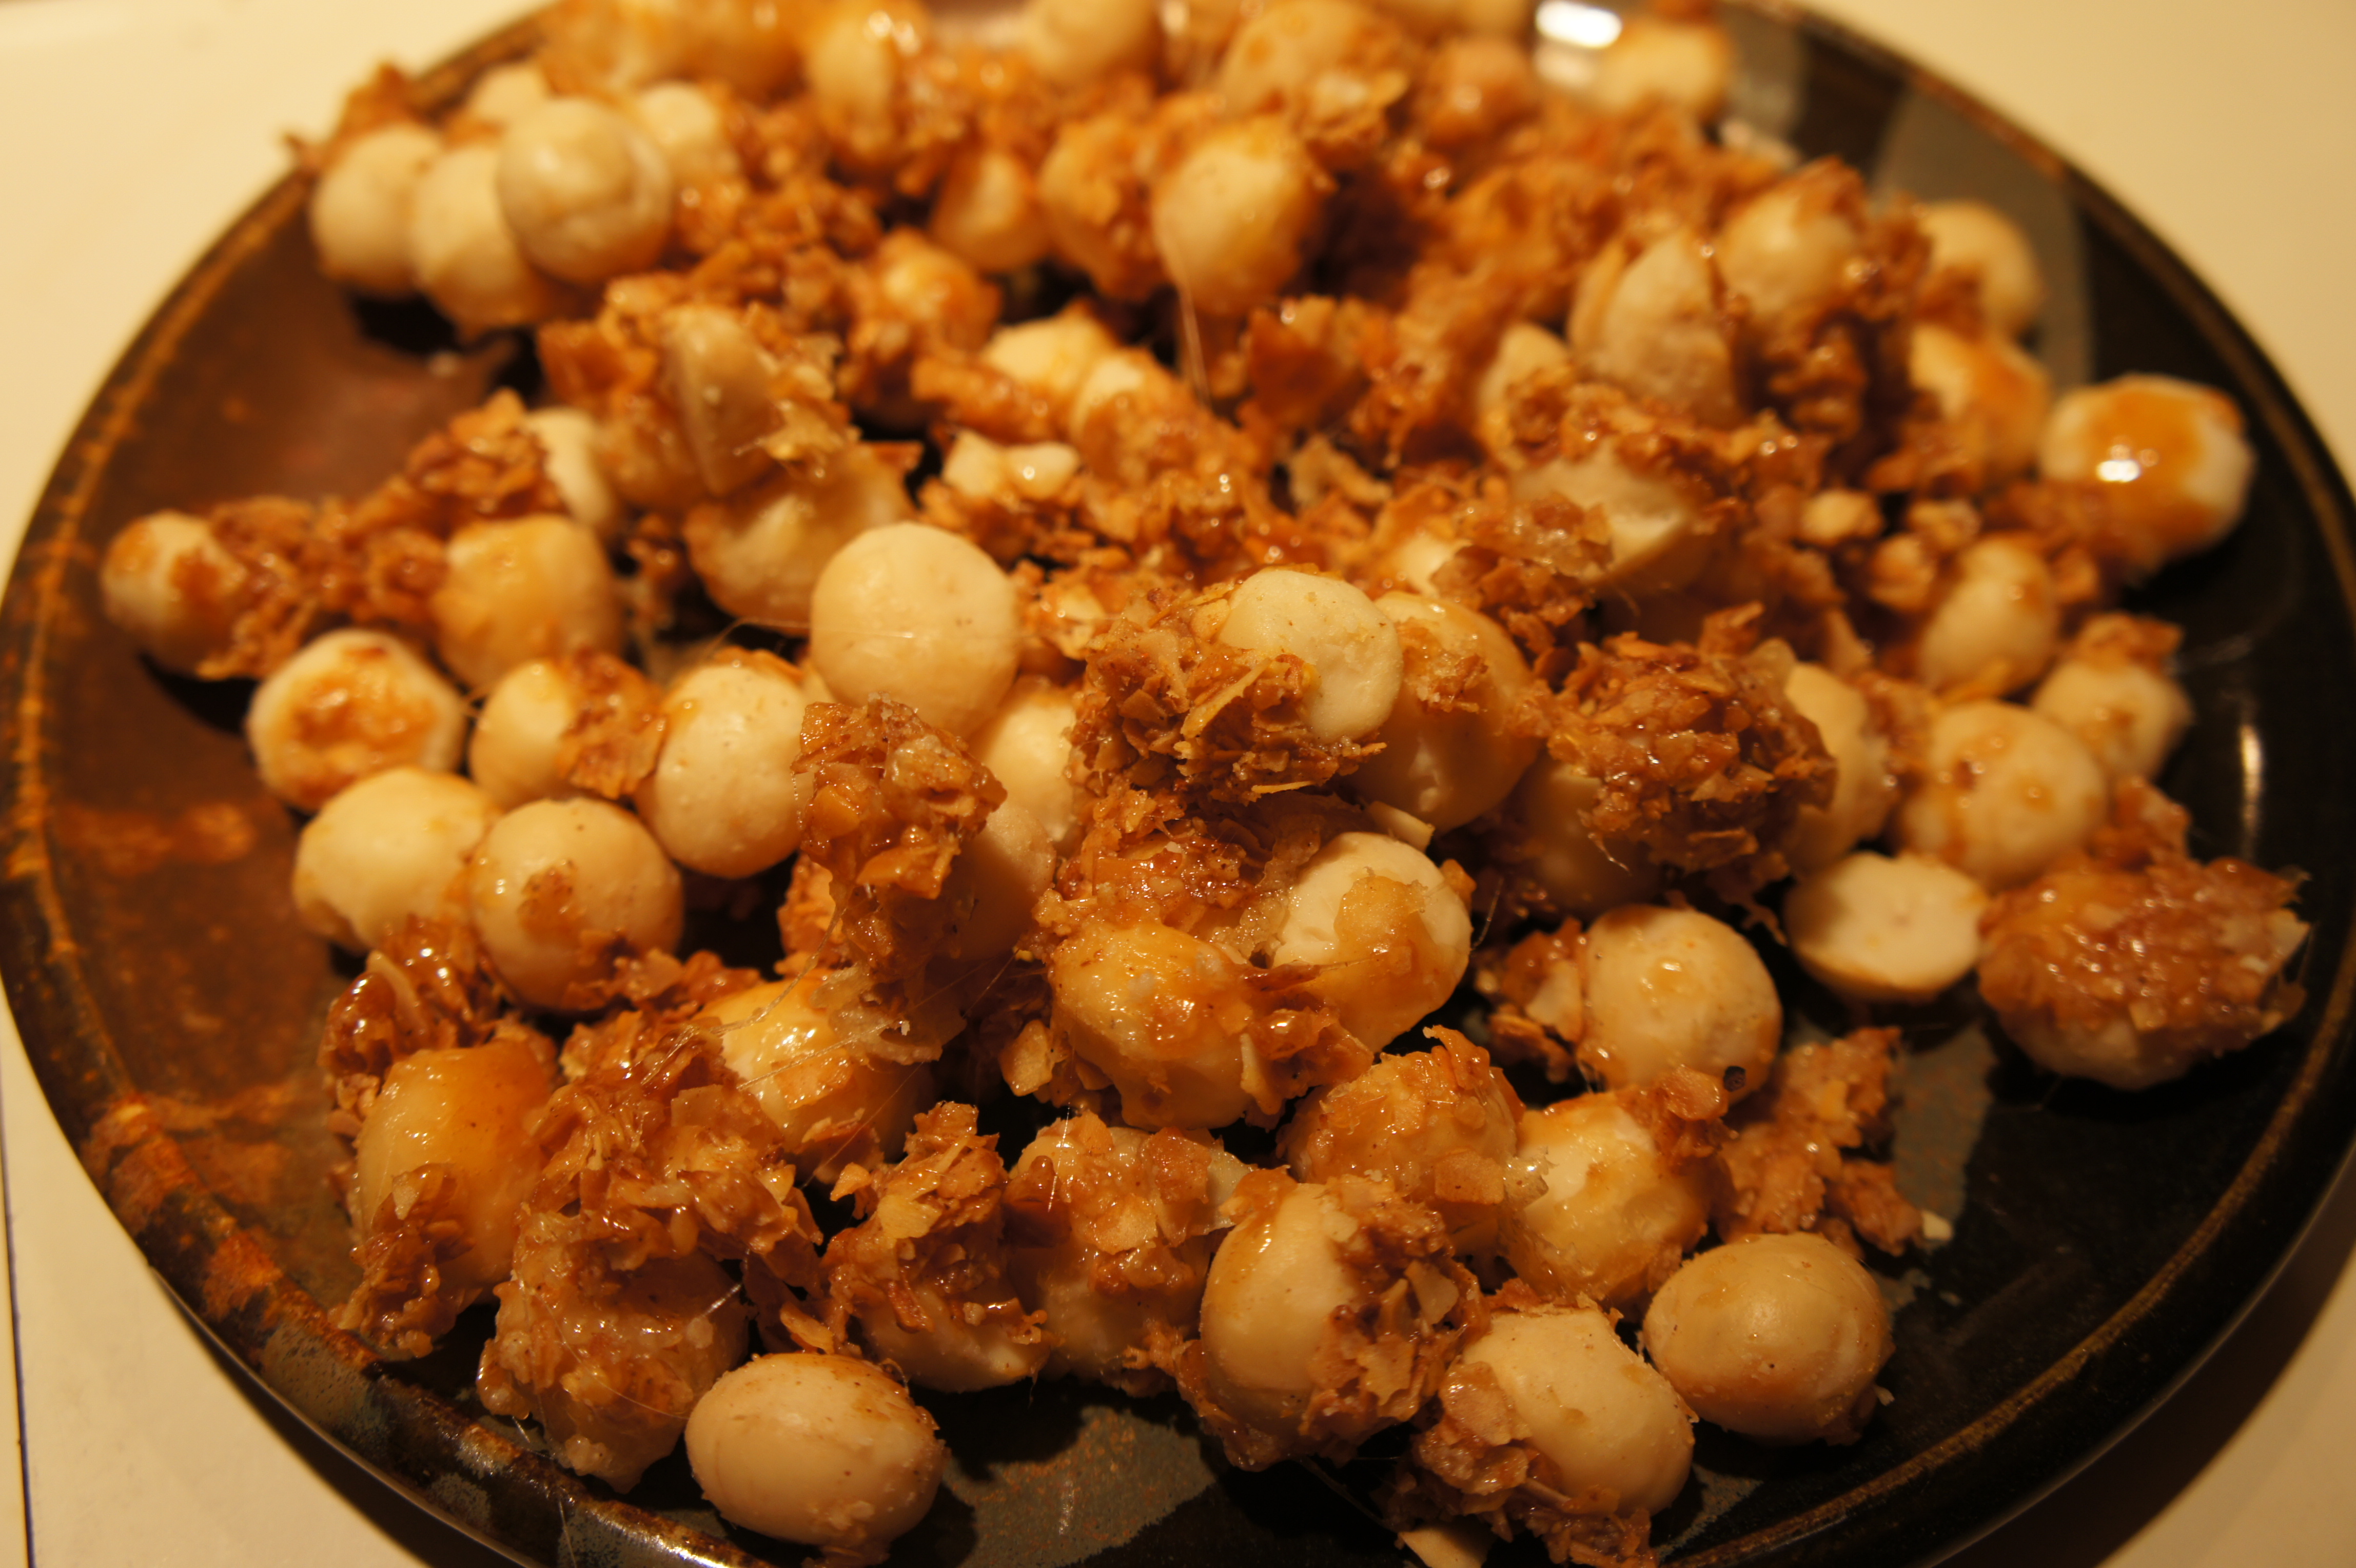
  4. Honey glazed – add a few tablespoons of good honey with the salt and honey, and toss to coat the vegetables before roasting
  5. A generous sprinkle of black pepper and pink peppercorns for a zingy punch
  6. Cayenne and red pepper flakes for spicy vegetables

Here are some pictures of the vegetables I’ve roasted recently.

SONY DSC IMG_1006 SONY DSC SONY DSC SONY DSC IMG_1042

What about you guys? How do you like your vegetables? Crispy crispy? Or less?

Spicy Cinnamon Honey Tea

Did you know that cinnamon is useful for something other than the cinnamon challenge?

My mother bought a giant container of cinnamon at Costco a week or so ago, and today she was puttering around the kitchen and pouring a spoonful of cinnamon. So I laughed and asked her if she was doing the cinnamon challenge… I had to show her a video of it before she got what I was saying. And then told me that it wasn’t funny (oh… mama, but it is!!). She also told me, before giving me a dirty look about finding people choking on cinnamon funny, that cinnamon has tons of health benefits and she was taking a little teaspoon of it every day before it helps with inflammation and gastrointestinal issues. Who knew?! (Health benefit-y stuff here)

Anyway – I haven’t been feeling so hot since that flu shot so I’ve been wandering around the house whining about feeling like “sheeeeet.” So my mom handed me a mug and pointed at the kettle before disappearing to do work. In light of our conversation about cinnamon, I dropped a teaspoon of cinnamon and some honey into the cup and poured some boiling water over it.

Guess what? The tea itself looks like mud, but it is delicious! It’s a little spicy, a little sweet, and it tastes yum!

It’s not a recipe people…. but here you go

1 tsp cinnamon, 1 tsp good honey, 1 cup of boiling water. Stir. Drink. Feel better.

images

(This is not my picture. I found it on google images. It’s pretty. I picked it. Done)

What do you guys do with cinnamon? Please say cinnamon rolls. I love cinnamon rolls…

Give Me Some Sugar

I’m not really sure why I decided to make iced sugar cookies, but a couple weeks ago it suddenly occurred to me that I “HAD” to make iced sugar cookies.

I did some research and then settled on a recipe and icing instructions from Bake at 350. Do you know her? Her website is pretty awesome and her cookies are just stunning. So pretty!!!

I made these cookies several times and there are two notes that are important. 1.) Use COLD butter, and 2.) These cookies are better with White Lily flour. They tend to be harder when you use all-purpose. Which is fine, but I like the more delicate crumb that this flour provides.

Anyway ~ I’m going to direct you to Bake at 350 for the recipe and instruction on royal frosting… mostly because they are so detailed and well written. Here. That way I can just show you all the pictures of my snowflakes!!!

Paleo Cabbage Ribbons

Did I tell you my sister and my mother keep a paleo diet? Yeah. I don’t really… I eat cookies and brownies. I don’t eat much pasta or bread, but I am not paleo. I just don’t have the self control, plus the three months I tried it all I did was eat bacon and eggs. You know what happens when you eat bacon and eggs every day? You get fat.

Anyway – my sister brought home these two gorgeous cabbages from her co-op and then promptly flew the coop for the west coast for the holidays. I’ve been staring at the two cabbages thinking “how much coleslaw can someone eat???”

However, I decided I wanted something warm and yummy. It is snowing outside, after all. I read a couple recipes about roasted slices of cabbage, and as I sliced into my pretty cabbage, I realized the slices wouldn’t stay together, let alone roast in a single piece. However, I threw caution to the wind and roasted my pretty slices. I generously sprinkled some salt, pepper, and good olive oil over the slices. I baked at 400F for about 40 minutes. I had two pans. One, I kept as tidy as possible and let the slices roast. And the second? I pulled apart those slices into beautifully toasted ribbons. I tossed a little chopped garlic in at the last minute and baked for another 5 minutes. Glorious.

Paleo Cabbage Ribbons (an inspired recipe)

  • 1 head of green cabbage, washed and the outer leaves removed
  • 4 cloves of minced garlic
  • salt
  • pepper
  • about 1/4 cup of olive oil (plus some as needed)
  1. Preheat the oven to 400F
  2. Slice the cabbage into slices and remove the core in the middle sections
  3. In two rimmed baking sheets, place the slices in the sheets, spaced apart well.
  4. Sprinkle with salt and pepper
  5. Evenly drizzle olive oil
  6. Bake at 400F for 40 minutes
  7. Break apart the slices into ribbons and toss with minced garlic
  8. Return to the oven for 10 more minutes, or until caramelized

SONY DSC SONY DSC SONY DSC SONY DSC

Super Chocolate Brownies

You know. I just don’t like home-made brownies. The boxes just GET it right. It is the ONE boxed good that I will concede is better than something I can make in my kitchen.

However, sometimes you just don’t feel like leaving the house for brownie mix and the remnants of your last chocolate binge will make a pretty decent brownie, melted and stirred in with some butter.

Here is my recipe. It calls for an obscene 1 cup of butter and 1 cup of chocolate. I use whatever little pieces of chocolate I have left over from chocolate bars, cookie recipes, and what not.

Be sure NOT to over bake – since the brownie will continue to bake in the pan after you remove it from the oven, be sure to take it out a few minutes before it is set. “JUST” about to set is how I describe it.

Enjoy lovies!

I’m off to polish off the rest of that wine and go sledding. It snowed again!!!

xoxo

-H

SONY DSC

Salmon Mousse

This is part of the very late Thanksgiving recipes… but I promise the recipes that I will post over the next few hours/days will be well worth the wait.

One of the appetizers I set out was spinach and artichoke dip… I wrote the recipe on the site a while back. The second was something NEW. I had never made Salmon Mousse before, but when I saw the recipe while flipping through my cookbooks, I knew I had to try it.

I’ve always enjoyed anything salmon, but recently I have been having a bit of a love affair with smoked salmon. Smoked sockeye salmon to be exact. I had 16oz of some beautifully smoked sockeye and whipped up this mousse.

My recipe suggested serving this piped onto cucumber circles with a bit of bread… but I decided to keep to the “dip” theme and left this mousse piled prettily into a dish for dipping purposes.

Anyway…. on to the mousse

Salmon Mousse (adapted very lightly from Williams-Sonoma’s Festive Entertaining)

  • 14 oz smoked salmon (I used sockeye), roughly chopped
  • 1/2 cup of Greek Yogurt (full fat)
  • 1/2 a teaspoon of cayenne pepper
  • 2 tablespoons of good quality olive oil
  • 1 lemon, juiced and zested
  1. In a food processor – combine all the ingredients. Zest the whole lemon into the processor and 2 tablespoons of the juice. Blend until smooth
  2. Cover and chill until ready to serve.

Simple. Delicious!


Coconut Spiced Macadamia Nuts

Oh hello… I bet you almost forgot that I actually post recipes and fun stuff! But I do have this lovely LOVELY recipe for you… finally!

If you are like me and are barreling through summer studying for an exam (ahem bar and board takers) you understand how stir crazy you get sometimes. After reading through evidence (of all horrible things) for a few hours, I was falling asleep in my chair. In attempt to perk up and distract myself from the fluffy pillows on my bed, I whipped up these roasted nuts, lightly spiced and crunchy sweet. I made them first with almonds, and then with macadamia nuts. I far prefer the macadamia nuts because of the contrast between the creaminess of the nut and the crunch of the coating. However, feel free to make these with any type of nut! The nuts end up just a bit coated in sugar and a bit crusted in coconut. Some of the coconut just caramelizes with the sugar and you get these delicious bites of spiced coconut. So… ON TO THE RECIPE!

The measurements are not exact, but this is what you need:

  • 1/2 cup of flaked, unsweetened coconut
  • 1 1/2 cups of macadamia nuts
  • 1/2 cup of sugar
  • 1/2 teaspoon of cumin*
  • A sprinkle of paprika and red peper powder*
  1. Lightly toast the coconut flakes. Stir in the spices and pour into a separate plate.
  2. In the same pan, sprinkle the sugar evenly over the surface and allow it to melt. Once the sugar has melted, you must work quickly so that it does not burn!
  3. Remove the pan from the flame and toss the macadamia nuts to coat in the sugar.
  4. Then quickly sprinkle the coconut mixture evenly over the tops of the glazed nuts and stir rapidly
  5. Quickly remove the mixture to a large, flat plate and cool.
  6. Store after completely cooled

* If you like a spicier nut, feel free to up the quantities of these spices. You could even crumble a little rosemary in here!

Image

The Giant Rhubarb In the Room

I went to the farmer’s market… and as I’m apt to do, I went a little crazy with the buying. I just like farmer’s markets and when I see all of the people and the produce I just want to buy it all.

I found an adorable gentleman who sold me two soft-shell crabs… I cleaned them (eeek!) and ate them with great gusto. I was pleased that I had cleaned them myself… but a little freaked out that they continue to move even as I was hacking into their vital organs and cutting their faces off. It makes me cringe still. ::cringe::

Well, last week I walked past anything that required cooking/baking because I was in study mode. I’m still in study mode, but I decided that this week I was going to just spend a couple hours cooking and enjoying myself before going back to :::i-want-to-kill-someone::: study mode. When I saw these arm length (or if you’re short, like me, 1/2 body length) rhubarb, I had to have them. They were so delightfully pink, I immediately grabbed them.

I did like Connie at ouichefcook and tossed the sliced rhubarb in sugar before letting it drain in the refrigerator for 8 hours. Then, I decided I wanted coffee cake crumbs in a buttermilk based cake. So I fused Lottie + Doof’s favorite cake with some coffee cake crumbs… with a layer of rhubarb in between the cake. So maybe I over-did it a little bit. I ended up with is a 9×13” cake that’s about 2 inches thick. I told you. I’m not good at subtle. Or a little. I like BIG. Bigger = better. DUH…  I might have been a Texan in a former life.

The crumbs are just perfectly crunchy and the cake is pillowy. And the layer of rhubarb is just acidic and tart enough to balance the crunchy crumbs. And since I absentmindedly left out the vanilla extract, the cake tastes just like rhubarb. I know some people won’t like it because it’s a bit tart, but this giant corner slice I pried out of the pan before it cooled is just delicious.

Anyway. Here is what I did

Giant Rhubarb Coffee Cake (Kaprise Kitchen interpretation from a little of this and a little of that)

  • 3 cups of flour, sifted
  • 1 1/2 teaspoon of baking powder
  • 1 teaspoon of baking soda
  • 12 tablespoons of butter, softened
  • 1 1/2 cup of sugar
  • 3 large eggs
  • 1 1/2 cup of shaken buttermilk

Rhubarb:

  • about 1 pound of rhubarb
  • 1/4 cup of granulated sugar

Crumbs:

  • 1/4 cup of brown sugar
  • 1/4 cup of granulated sugar
  • 1 teaspoon of cinnamon
  • 1/2 teaspoon of ground ginger
  • 8 tablespoons of melted butter
  • 1 1/2 cup of flour
  1. About 8 hours before you plan on baking, or the night before (or in the wee morning hours): wash and slice the rhubarb. Toss with 1/4 cup of sugar. Place in a colander over a mixing bowl. Cover and refrigerate.
  2. After 8 or so hours have elapsed,  shake the excess moisture from the rhubarb and discard the liquid that has drained. Set the rhubarb aside.
  3. On to the batter!!
  4. In a large bowl, whisk together the butter and sugar together, adding one egg at a time until creamy and smooth
  5. Whisk in the buttermilk.
  6. Stir in the flour, baking powder, and soda (I normally stir 1/2 of the flour with the baking powder and soda into the mixture, and then stir the remaining flour in. Mostly because I don’t have another mixing bowl to combine dry ingredients, and because this works just fine)
  7. The batter should be a little thicker than normal cake batter.
  8. Line a 9X13” baking pan with buttered parchment paper. Butter the sides of the pan as well.
  9. Spread about 2/3 of the batter in the bottom of the pan.
  10. Add the rhubarb in an even layer over the batter
  11. If you prefer a less tart cake, sprinkle 1/4 cup of brown sugar over the rhubarb layer to counteract the acidity of the fruit. I left this out because I like the bite.
  12. Dollop the remaining batter over the rhubarb. Because the batter is pretty stiff, I drop blobs of the batter over the rhubarb and then lightly tap the pan on the counter to even it out a bit.
  13. In a bowl, combine the crumb ingredients. I make crumbs by squishing the ingredients into a ball and then breaking the ball apart over the cake.
  14. Bake at 350 degrees Fahrenheit for about 60 minutes. Mine took about 65 minutes, but I was also peeking in the oven to check on my baked potatoes (because there is nothing like multitasking your oven!)
  15. A tester should come out nearly clean from the center of the cake. Remember that the rhubarb is moist so the cake around the rhubarb will be moist – so be cautious of overbaking since your tester won’t be perfectly clean coming out of the cake. However… make sure the cake is sufficiently baked, otherwise the cake will be dense and gummy. (I know. Not an exact science, but I normally press a finger at the center of the cake, and if it springs back, it’s normally done).

Cheese Straws and Circles

When I was a kid, my summers were filled with books and lots of time running in the sun dappled yard. My mother would us strap us into our trusty red Volvo, and drive us to the library with the windows down. We’d sneakily stick our hands out the window to feel the wind push our hands back. My sisters and I would quiet the minute we go to the library, solemnly picking out our books and propping ourselves on the stacks to read the interesting ones right away. And after the air-conditioning had sufficiently seeped into our bones, we would pile back into the car with our stacks of books. We would spend the rest of the afternoons with our piles of books in the yard reading. I remember sitting on blankets on the deck reading books until the sun set. The soft breeze rippling through the grass and the shade on the deck lulling me into the books.

Well, other than wishing that these huge tomes of law books were nearly so fun to read and that I was still in my backyard plastered to my books like I was as a kid… I remember reading a story that talked about cheese straws. It sounded so glamorous and delicious. The main character was in London, and her friends were visiting and she scraped together these cheese straws with “just a bit of butter, cheese, flour, and water.” I wanted to feel as glamorous in my chic apartment munching on cheese straws… so I obviously tried my hand at it. My mother’s the forgiving sort that let us experiment with all of the kitchen supplies, and would patiently watch while we insisted we knew what we were doing. After mushing together an extraordinarily expensive chunk of cheese with some flour, water, and butter… I baked my little straws. They were actually just awful. I was just a kid, but the cheese straws I imagine in my head were light and crunchy and melted on your tongue. The ones that I had made were heavy blocks of floury cheese.

Needless to say, I never looked at another recipe for cheese straws again. I just wasn’t interested in baking blocks of disappointment. But, then two years ago when I started law school, I was actually living alone in my chic little apartment with my equally chic little puppy. I felt that it was time to try my hand at cheese straws again. I followed the recipe on smittenkitchen, which was delicious, but the dough was just a bit too substantial for me. I wanted little straws that were meltingly lovely and that were equally pretty. So, I tweaked. Just a bit. And discovered that a combination of cheddar and the best Parmesan (that my teensy grocery carries) made all of the difference. A generous sprinkle of crushed red pepper made them just spicy enough, and of course, all food must be pretty… so I used the teensiest fluted cutter I have.

Cheese Circles (Adapted from smittenkitchen, who references Lee Bros. Southern Cooking)

  • 1 1/2 cup of cheddar cheese, grated finely
  • 1/2 cup of Parmesan cheese, grated finely
  • 4 tablespoons of good butter, at room temperature
  • 3/4 cup of flour
  • 1/2 teaspoon of flaky sea salt
  • 3/4 teaspoon of crushed red pepper flakes, I whizzed mine through a food processor to get smaller flakes
  • 1 to 2 tablespoons of heavy cream
  1. In a large bowl, mix together the cheeses, butter,  flour, salt, and pepper. Work the mixture together until the dough is crumbly and well incorporated.
  2. Slowly drip the cream into the bowl, stirring until the dough comes together into a cohesive ball.
  3. On a lightly floured table (or counter) roll the dough out to about 1/4 inch. Cut with a 1/2 inch cookie cutter. Or whatever size you desire.
  4. Bake at 350 degrees Farhenheit for 10-15 minutes. The circles should be golden and have poufed up a bit.
  5. Note: In one of my runs, I sprinkled a little Parm over the tops of the circles and that was delicious also… but I prefer mine without.

Easy Peasy Zucchini and Feta Squares

This is a tart of sorts… it’s a pie? I don’t know what I should call it, but I needed something to help me procrastinate my little heart out. I’m having the worst time focusing on finals this year. I’m good at waking up, but the only thing getting me out of bed is dehydration this semester. This is the first semester I have been single since starting law school, so I have been getting more work done (no pesky boys clamoring for my time), but I’ve also been distracted. I’m thinking about running and getting back into top running form. I’m thinking about where to jet off too… I just want to be on the move.

This morning, my neighbor invited me to run with her running group. I went along and it was phenomenal. I ran 10 miles with the group, paced at about 9:30/mile. It was wonderful. I was back in my apartment by 9:00am. But, the only thing I have been having problems with is splitting headaches after my long runs. I don’t know if anyone else has this problem… but about an hour after finishing a longer (more than 7 miles) run, I’m sitting with my head in my hands with a horrible headache. So instead of hitting the library as planned, I was zoinked out on my bed sleeping off my headache. Maybe it’s the water. Or maybe, like my neighbor suggested, it’s because I run without water and without any nutrition. I just go. Hmm.

This tart is super easy. Five ingredients, thirty minutes, and delicious. You can use any variation of vegetables. I imagine it’s delicious with some squash, maybe thin eggplant slices? Or even tomatoes. Or potatoes… the possibilities are endless.

Easy Peasy Zucchini and Feta Squares (the result of Kaprise Kitchen procrastination)

  • 1 zucchini, thinly sliced. If you have a mandoline (I do not) this would be supremely easy
  • 1 small onion, thinly sliced
  • 8-10 sheets of phyllo dough (I used 8 out of a package, but feel free to use whatever thickness or variation)
  • 4 oz of feta cheese, crumbled finely
  • 3 tablespoons of butter, melted
  1. Place the phyllo dough on a cookie sheet, brushing the bottom of the first sheet with butter, and brushing alternating layers lightly with butter.
  2. Spread crumbled feta cheese once inch from the sides of the phyllo dough.
  3. Arrange the zucchini and onion slices on top of the feta cheese
  4. Fold the sides of the dough up to cover a little bit of the zucchini and onion.
  5. Brush with butter
  6. Bake at 350 degrees for 20 minutes, or until golden brown